View Menu – Set Access Levels
Purpose: To set access level security.
Please read Set Passwords to Control Security before continuing.
Preparation:
Appoint and publish the name of the System Administrator.
Draft, agree and publish the Security Policy – consider issuing copies for staff to sign as appropriate.
Decide on which type of system security to use.
Assign access rights and agree these with Department Managers.
Ensure any changes in Access Rights are properly authorised in accordance with Security Policy requirements.
Processing:
This consists of two tasks which may be performed in any order, as follows:
Set Access Levels – You assign a Security rating to each task in a process.
Set Level Passwords – You assign a password to each level. For example, in the example below a user would be asked to input the Level 3 Password before hold or release transactions to the ledger.
Set Access Levels:
On the main menu click View > Security > Set Access Levels to open form.
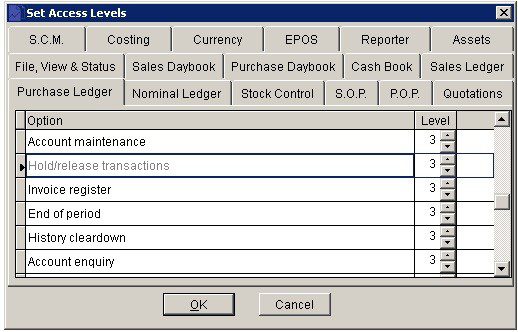
Click relevant tab to select required page.
Select the required task from the list displayed by using the scroll bar at the right of the page.
Click the scroll box to select the required Security Level 1 through 5
Repeat steps above as necessary.
When you have finished, click OK to close the form and update records.
At any time, click Cancel to exit the task – warning will be displayed – click Yes to continue, No to cancel and return to the form.
Set Level Passwords:
On the main menu click View > Security > Set Level Passwords to open form.
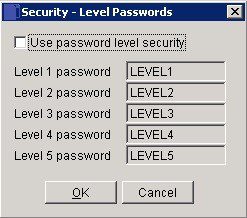
Check box ‘Use password level security’
In each box, enter the required Password for that Level. This can be up to 8 alphanumeric characters and/or symbols with no spaces allowed. We recommend you use Strong Passwords – see Set Passwords to Control Security – Passwords for further information – previous article.
When you have finished, click OK to close the form and update records.
Note the passwords and the date on which these are created/changed.
At any time, click Cancel to exit the task.
Warning will be displayed – click Yes to continue No to cancel and return to the form.
When you next restart the system and select the company, you will be asked to enter your password. Your Prelude Desktop product will start as normal, but you will find that any inaccessible menu options are greyed out and you will be unable to access them.
Ongoing Control
The System Administrator should keep a log of Access Rights in a secure place, noting when these change. Passwords should be changed regularly, by the system administrator, and communicated to relevant users.
0 Comments