Sales Ledger – Produce Invoices
Purpose:
To produce and send out Sales Invoices as soon as possible after you have delivered goods and/or services to your customers. The system will also allow you to reprint Sales Documents – see Parameters Form.
Preparation: The following list of possible preparation steps will help you decide if you need to do anything before processing and if you need help.
- Select a company – see Change Companies.
- Obtain an up-to-date customer list – see List Customers.
- Obtain an up-to-date nominal code list – see List Chart of Accounts.
- Ensure customer details are up to date – see Create & Edit Customer Accounts.
- Ensure you have details of Delivery Addresses for goods despatched.
- Ensure the Product file is up to date for price changes – see Add & Edit Products or Services.
- Set the default transaction date as required – see Change Default Transaction Date.
- If using Matrix (Customer specific) Pricing: –
- For first time use only: Activate Matrix Pricing, select the Product Cost to be used for Margin Calculations and the Discounts to be used – see Stock Control Parameters – General Page.
- Ensure that Price Matrices have been created/amended as required – see Create & Edit Customer Specific Pricing (Price Matrices).
Processing:
- On the main menu click Daybooks > Sales Daybook > Produce Invoices or;
- On the main menu click View > Configure Toolbar > Open Form – see Configure Toolbar form.
- Check the box to the left of Produce Sales Invoices.
- Click Apply button to display the Control Button –
- Click the Control Button to open the form.
- Select print options from the form which now opens – see Printing Reports.
- Once this is complete, Click OK to open message box – click Yes to post to the next period, or No. Form opens.
- Either: Select customer and invoice number – see forms below, or; type in a new account number then click Yes on the message box to create a new account – see Add Customer Account Form – remember to enter the customer’s full details as soon as you can – see Create & Edit Customer Accounts.
- Enter data – each line on the sales invoice is entered separately. Use mouse or tab keys to navigate along lines and Return to accept the entries and move to the next line.
- Click OK to close form and produce invoice or click Cancel.
Balancing/Reconciliation:
Export or print Daybook Listing run as at the system date and confirm all invoices posted – see Print Sales Daybook Listings.
Filing:
If required, create .pdf copy of Invoices and Daybook report and file in backed up directory.
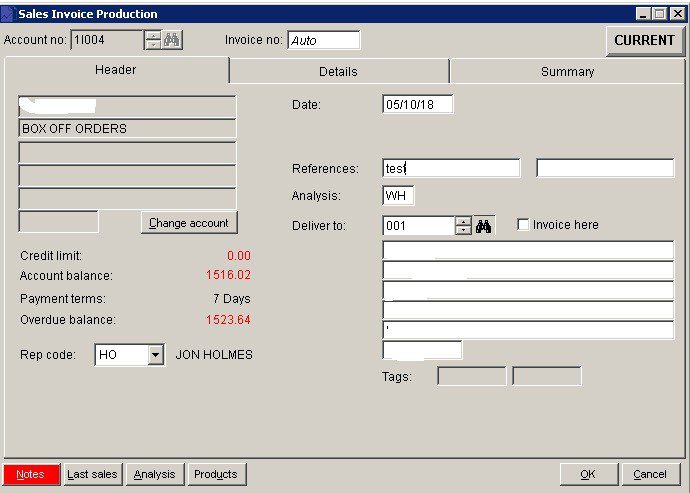
- Account No: Either: Click on up and down arrows to scroll through list, and click OK or press Return when required selection is displayed, or: Search for required code.
- Invoice No: Automatically generated or enter if Override is checked on Sales Ledger Page of Parameters Form.
- Rep Code: If enabled, select the relevant sales rep code.
- Date: Either: Manual entry formatted as DD/MM/YY. Type over the parts of the date you wish to change – the system will skip over the “/” part itself. If the date you enter is invalid; the cursor will return to the start of the date and await a valid entry, or; click on the field to highlight data – white on a blue background – then Right Click to open the Calendar Menu – see Dates and Calendar.
- References: 2 fields of 16 characters.
- Analysis: Maximum 2 characters account specific – customers can be grouped together for reporting. Defaults to code shown on ledger account – see Sales Reporting.
- Deliver To: Select Delivery Address. Check Invoice here to invoice to the delivery address.
- Notes: Open Notes Form and enter text as required. Notes are stored as a permanent record and are specific to a Ledger account or Product or Service. They can be read and updated at any time by any user with access to the company. Entries should ideally show a date and the name or initials of the author. Entries will make a NOTES flag visible whenever the Ledger Account/Product is selected.
- Click ‘OK’ To save and close or ‘Cancel‘ to close without saving.
- Data: The account balance and overdue balances are shown for reference. You will see in this example that the overdue balance includes credit notes that have not been matched. The overdue balance is the balance which is 30 days old and will exclude any unmatched credit notes – this is normal accounting practice. It is always good practice to match credit notes as soon as they are raised.
Multiple Invoices
If you click on OK on the first form – rather than selecting an account you will be presented with this form –
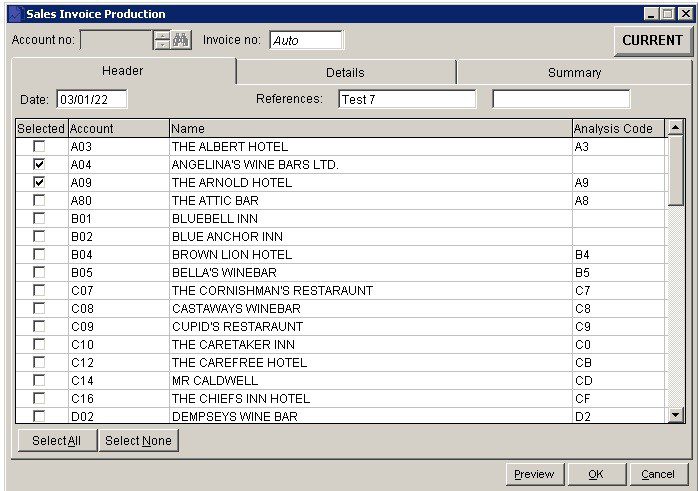
You can select as many customers as you wish to send them all the same invoice – Useful for businesses that do multiple/bulk invoices for the same items. Having selected the customers just continue to produce the invoice in the normal way.
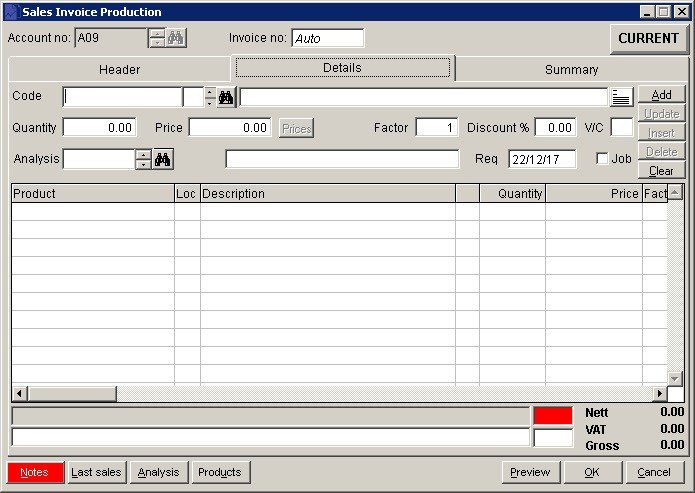
- Code: Scroll or Search to select required Product – if not a stock item enter details in description field.
- Line Notes: Click …. to add additional printed notes.
- Enter Quantity, Unit Price, Factor if needed (matches the cost of individual items bought in lots with the selling price of those items sold individually. System divides the cost or selling price by this factor when calculating margins), Discount , select appropriate VAT Code. Select Analysis Code – Nominal account. Check Job – if appropriate.
- Note: Price from stock file if stock item & quantity field will go red if stock taken below zero.
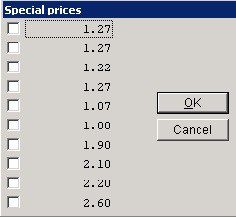
If special prices created clicking on the prices button will bring up –
- When line details complete click on ‘Add’ to add to grid.
- Click on ‘Update‘ if you wish to amend – update then click on ‘Update‘ again.
- ‘Insert’ inserts line details above highlighted row.
- ‘Delete‘ deletes highlighted line on grid.
- ‘Clear’ clears entries in line – not the grid.
‘OK‘ to save or ‘Cancel’ to clear and close without saving.
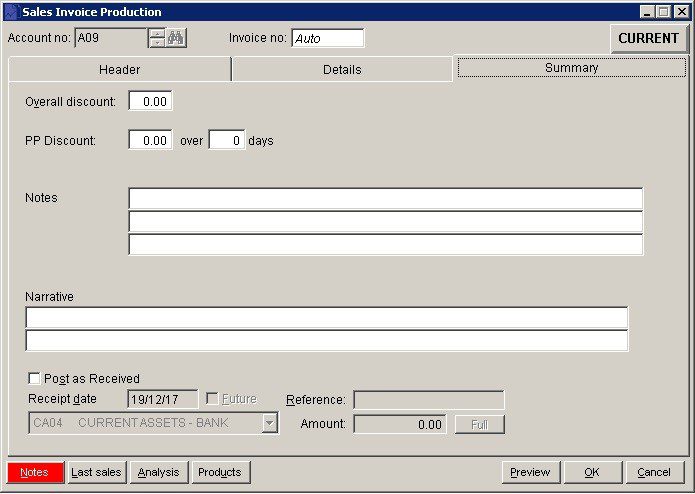
- Overall Discount: Discount applying to total invoice value.
- PP Discount: Prompt Payment discount available for settlement within number of days from invoice date.
- Notes & Narrative: Text which can be displayed on invoices/credit notes as required by including these fields in your Stationery Design.
- ‘OK’: Update ledgers, generates and prints invoice/credit note .
- If Use document reprints field is checked on Sales Page click Yes to reprint – see Parameters Form.
- Cancel: Click to open warning message box – click Yes to close form without update, No to return to page.
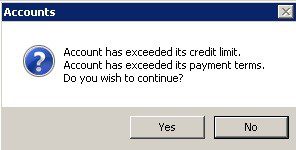
If, when processing invoices, the account is over its credit limit or payment terms the following warning appears.
If invoices are paid immediately – in full or in part check the Post as Received checkbox, enter a Reference, amend date and enter the amount or click on the Full button if fully paid.
The amount paid and the balance still outstanding can be shown on the invoice. The Stationery design will need to have the PAID_AMT and BALANCE_AMT fields adding to the invoice design.
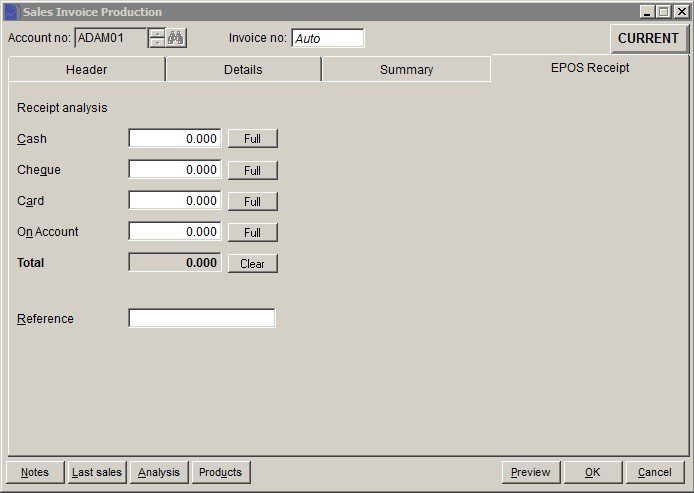
In EPOS parameters if ‘Enable EPOS receipt in Sales Daybook Invoices is checked the following tab is added to the Sales Invoice production form. This allows formal invoices to be created for till sales and payment to be immediately posted. The payment will update the till’s payment analysis.
A margin by invoice value display is available on request –
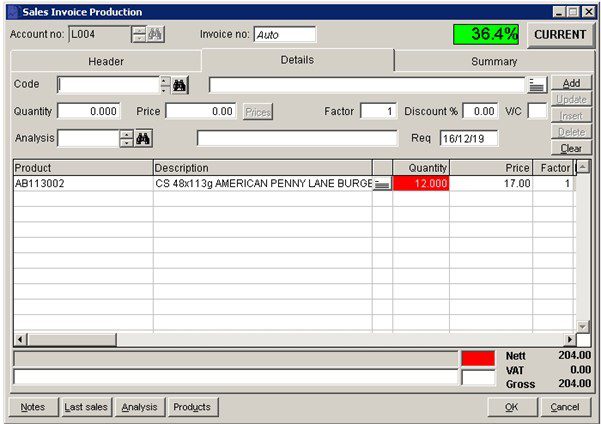
The calculation is based on these two fields in Stock Maintenance –
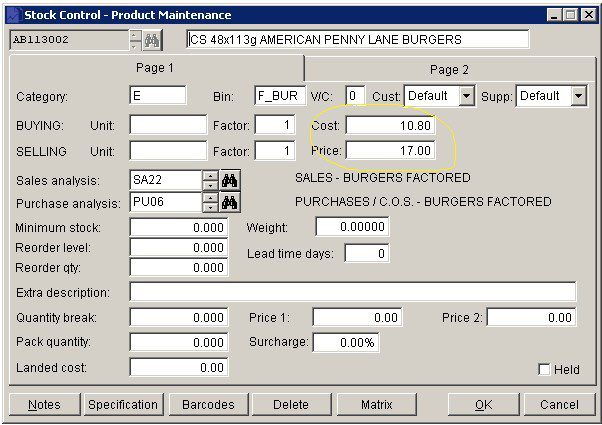
The margin percent is colour coded (background) depending on the percentage achieved. The prelude.ini file looks like –
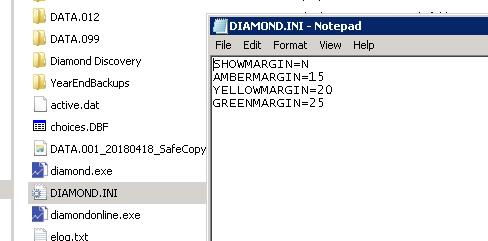
The margin display is activated when SHOWMARGIN=Y. The background colour shown will be Amber if percent is equal to or greater then 15%, Yellow if greater than 20% and Green if greater than 25%. These values can be changed to suit but each one must be greater than the previous. If the percentage is les than the amber margin the colour will be Red.
Convert invoice to repeat template
Sales invoices can be converted to Repeat invoice templates –
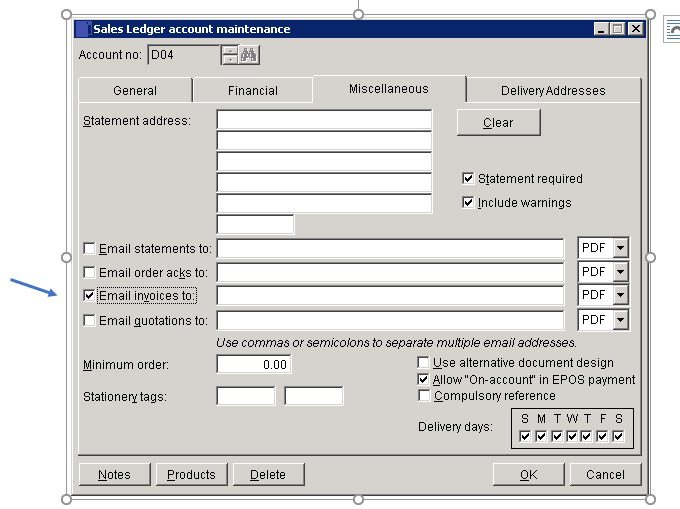
Step 1 – Ensure the customer maintenance allows for email option ( to bring up the output form) – tick and click ‘OK’- enter email addresses, if appropriate.
Step 2 – Create the invoice (as above)
Step 3 – When complete the output form appears with a check box –
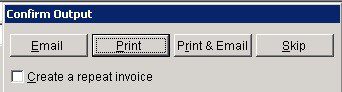
Step 4 – click the check box and select the output. The invoice will be produced, followed by the repeat template form –
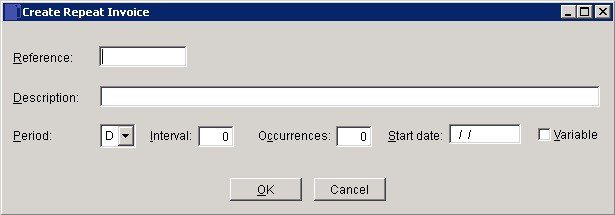
Step 5 – complete the form – remember that the first invoce has been produced so start date is for the next one. See https://help.prelude.software/knowledge-base/sales-ledger-repeat-invoices/
The new template will be saved with all other templates raised and acessed from Daybooks > Sales Daybook > Repeat Invoices
Sales invoices can also be used to send as a receipt once the invoice has been paid in full, see