Sales Ledger – Create Sales Documents
Purpose:
Use for manual or proforma Invoices as well as other types of despatch document.
Preparation: The following list of possible preparation steps will help you decide if you need to do anything before processing and if you need help
Select a company – see Change Companies.
Obtain an up-to-date customer list – see List Customers.
Obtain an up-to-date nominal code list – see List Chart of Accounts.
Ensure customer details are up to date – see Create & Edit Customer Accounts.
Ensure you have details of delivery addresses for goods despatched – see Create and Amend Delivery Addresses.
Ensure the product file is up to date for price changes – see Create & Edit Products and Services.
Set the default transaction date as required – see Change Default Transaction Date.
For first time use only: on the main menu click View > Parameters > Sales – see Sales Parameters – General Page.
For first time use only: design and name up to 5 different document formats – see Stationery Design.
Obtain the next number to be used for the document.
Processing:
On the main menu click Daybooks > Sales Daybook > Documents > Document Entry.
Select print options from the form which now opens – see Printing Reports.
Once this is complete, click OK to open Document Entry Form.
Either: Select customer and enter a document number – see Sales Document Entry form below, or; type in a new account number then click Yes on the message box to create a new account – see Add Customer Account Form – remember to enter the customer’s full details as soon as possible – see Create & Edit Customer Accounts.
Enter data – each line on the document is entered separately. Use mouse or tab keys to navigate along lines and Return to accept the entries and move to the next line.
Click OK to close form and print document or click Cancel.
Filing:
One copy of invoice to be filed in number order with Daybook listing for that day’s input.
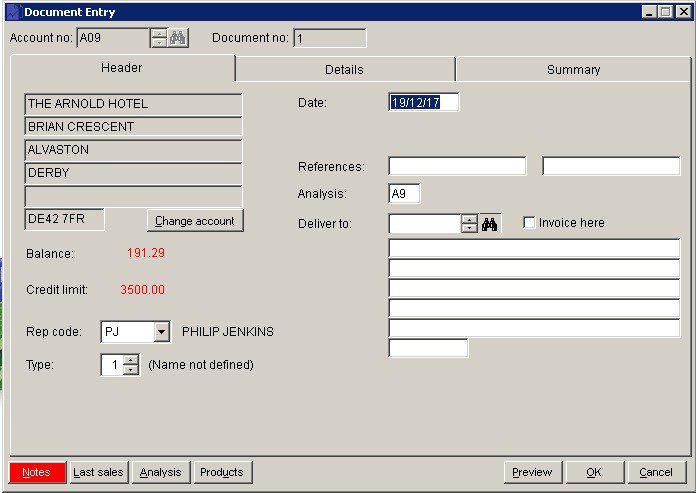
- Account No: Either: Click on up and down arrows to scroll through list, and click OK or press Return when required selection is displayed, or: Search for required code.
- Document No: Automatically generated or enter if Override is checked on Sales Ledger Page of parameters form.
- Rep Code: If enabled, select the relevant sales rep code.
- Date: Either: manual entryformatted as DD/MM/YY. Type over the parts of the date you wish to change – the system will skip over the “/” part itself. If the date you enter is invalid; the cursor will return to the start of the date and await a valid entry, or; click on the field to highlight data – white on a blue background – then Right Click to open the Calendar Menu – see Dates and Calendar.
- References: 2 fields of 16 characters.
- Analysis: Maximum 2 characters account specific – customers can be grouped together for reporting. Defaults to code shown on ledger.
- Account – see Sales Reporting.
- Type: 1 of 5 Document types.
- ‘OK’ to save or ‘Cancel’ to clear and close without saving.
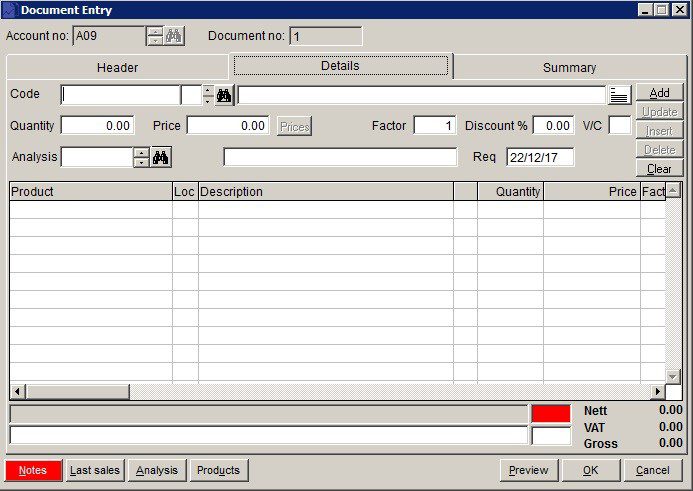
- Code: Scroll or Search to select required Product – if not a stock item enter details in description field.
- Line Notes: Click to add additional printed notes.
- Enter Quantity, Unit Price, Factor if needed (matches the cost of individual items bought in lots with the selling price of those items sold individually. System divides the cost or selling price by this factor when calculating margins), Discount, select appropriate VAT Code. Select Analysis Code – Nominal account. Check Job – if appropriate.
- Note: Price from stock file if stock item & quantity field will go red if stock taken below zero.
If special prices created clicking on the prices button will bring –
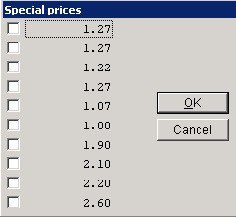
When line details complete click on ‘Add‘ to add to grid. Click on ‘Update‘ if you wish to amend – update then click on ‘Update’ again.
‘Insert’ inserts line details above highlighted row.
‘Delete‘ deletes highlighted line on grid.
‘Clear’ clears entries in line – not the grid. click on ‘OK’ to save or ‘Cancel’ to clear and close without saving.
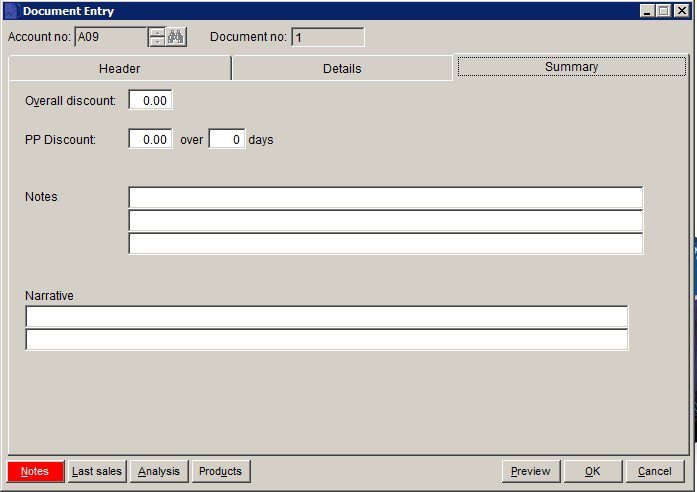
- Overall Discount: Discount applying to total invoice value.
- PP Discount: Prompt payment discount available for settlement within number of days from invoice date.
- Notes & Narrative: Text which can be displayed on invoices/credit notes as required by including these fields in your Stationery Design.
- ‘OK’: Update Ledgers, generates and prints invoice/credit note.
- If Use document reprints field is checked on Sales Page click Yes to reprint – see Parameters Form .
- Cancel: Click to open warning message box – Click Yes to close form without update, No to return to page.
0 Comments