Purchase Ledger – Create And Edit Supplier Accounts
Purpose:
When you are creating a supplier for the first time or an existing supplier notifies you of a change of address, or the name of your contact changes etc.
Preparation:
Obtain an up-to-date list of suppliers – see List Suppliers.
Obtain supplier details as required to complete the form.
Confirm credit levels and payment terms.
Agree the analysis code to be used for this supplier with Purchasing Department – this is a two-character code that can be used to report supplier activity in a way that is meaningful for you business – you design the codes to be used – see Print Supplier Analysis.
Processing:
On the main menu click Ledgers > Purchase > Account Maintenance, or;
a) On the main menu View > Configure Toolbar > Open Form – see Configure Toolbar Form.
b) Check the box to the left of Purchase Ledger Account Maintenance.
c) Click Apply button to display thecontrol button –
d) Click the control button to open the form.
Complete form details – see Purchase Ledger Account Maintenance form below.
Click OK to update records.
Filing:
Consider filing source data with any other supplier information held – you could write the date on which the record was set up/amended on the source data.
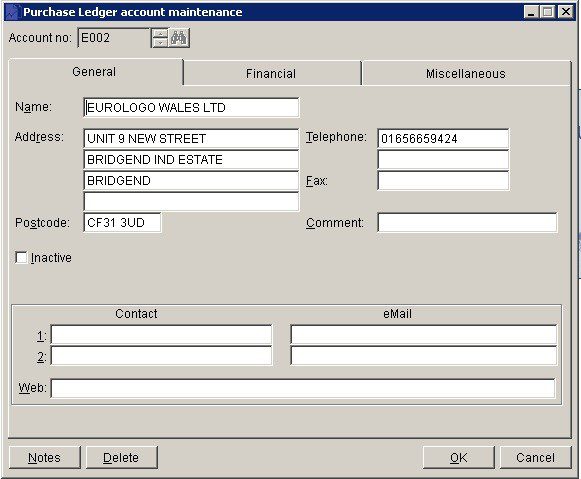
- Name, Address, Postcode, Telephone & Fax: Enter details as you see them on invoices etc.
- Comments: Anything that may be useful – can be printed on documents if required.
- Contacts: The two most useful – Usually Accounts and Sales.
- Notes: Any contact with supplier can be noted.
- Products: Displays the products form. Set Product specifications and other product information specifically for this supplier.
- Delete: Once transactions have been entered the account cannot be closed. If no longer required then perhaps set the account to inactive.
- Open Notes form and enter text as required. Notes are stored as a permanent record and are specific to a Ledger account or Product or Service. They can be read and updated at any time by any user with access to the company. Entries should ideally show a date and the name or initials of the author.
- Entries will make a NOTES flag visible whenever the Ledger Account/Product is selected.
- Click ‘OK’ To save and close or ‘Cancel‘ to close without saving’.
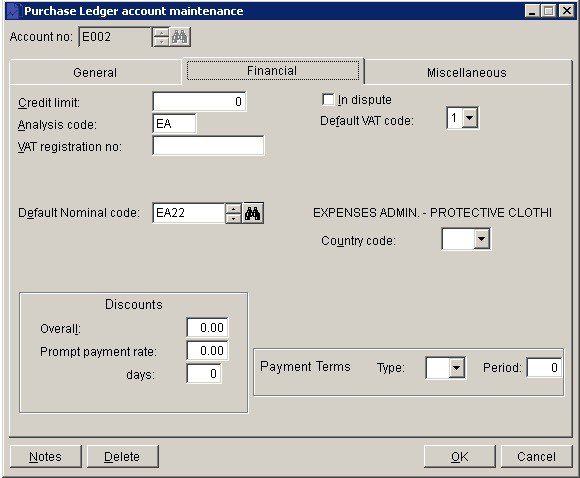
- Credit Limit: Type in an amount – depends on trading history, references and required spending (0<9999999999).
- Analysis: Two-character grouping for reporting customer performance.
- VAT Code: Default VAT code to be used when posting supplier invoices and credit notes.
- VAT Reg No: For EC Suppliers – includes country code at beginning e.g. BE125631.
- Nominal Code: Relates to default sales code in nominal ledger – can be overwritten in invoice posting.
- Country Code: Select from list – can be used for export analysis by country.
- Currency Code: Select from list – used in invoicing – If customer requires invoicing in another currency, you will need to set up another account for that customer.
- Discounts: Input %, Days is the number allowed for prompt payment from invoice date.
- Payment Terms: Payment terms are measured between invoice date and default transaction date. Select:
- D – days from Invoice Date.
- E – End of Month – displayed as ‘Days EOM’ in reports.
- Due date is ‘Period’ days after the last day of the month of the transaction date.
- M – months from Invoice Date.
- C – calendar months from Invoice Date – Nett Monthly.
- For example, ‘M’ transactions posted during January do not move to the next period until March 1, i.e. the month following the end of the month in which the invoice was raised. ‘C‘ transactions posted anytime during January become a month old on February 1.
- Period: Input the number of Days, Months or Calendar months from invoice date that credit is given.
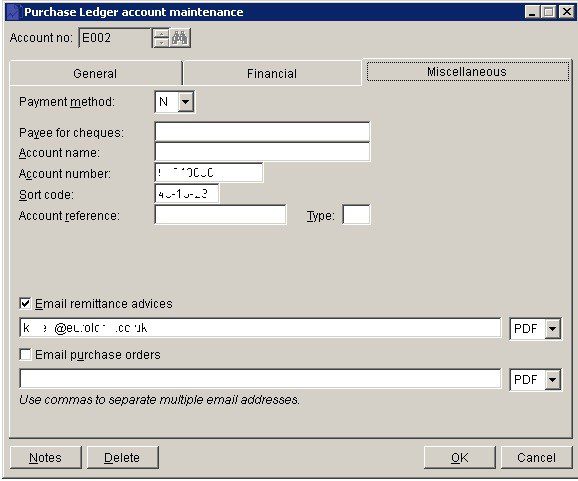
- Payment method: Select your preferred payment method for this supplier: M – Manual (i.e. not system-generated), C – cheque, E – Electronic, None.
- Payee: Enter supplier’s bank details – used for BACS list -( E-Pay) or cheque raising.
- Remits and Orders: You can also use semi-colons to separate email addresses.
- Account Reference: Enter what you want the recipient to see on their bank statement or remittance.
- ‘OK’ – Update records and close form.
- Cancel – Close without updating.
Search for existing details
Please refer to https://help.prelude.software/knowledge-base/cash-book-post-sales-ledger-receipts/ – bottom of page for details of search facility