Cash Book Import
Purpose:
To import large amounts of data into the cash book in order to save time and ensure accuracy.
Preparation:
Have remittance advices to hand and details of payments.
Processing:
Click on Banking > Cash book import.
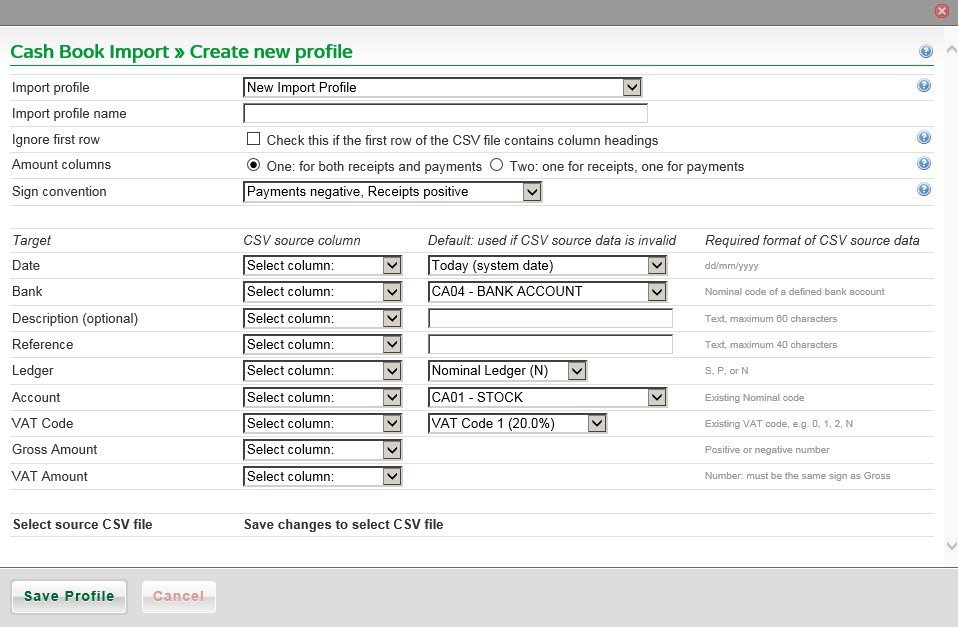
- Import profile: Choose New Import Profile, select an existing profile or select one of the standard profiles.
- Import profile name: If new, enter descriptive name – so that it is recognisable for future use.
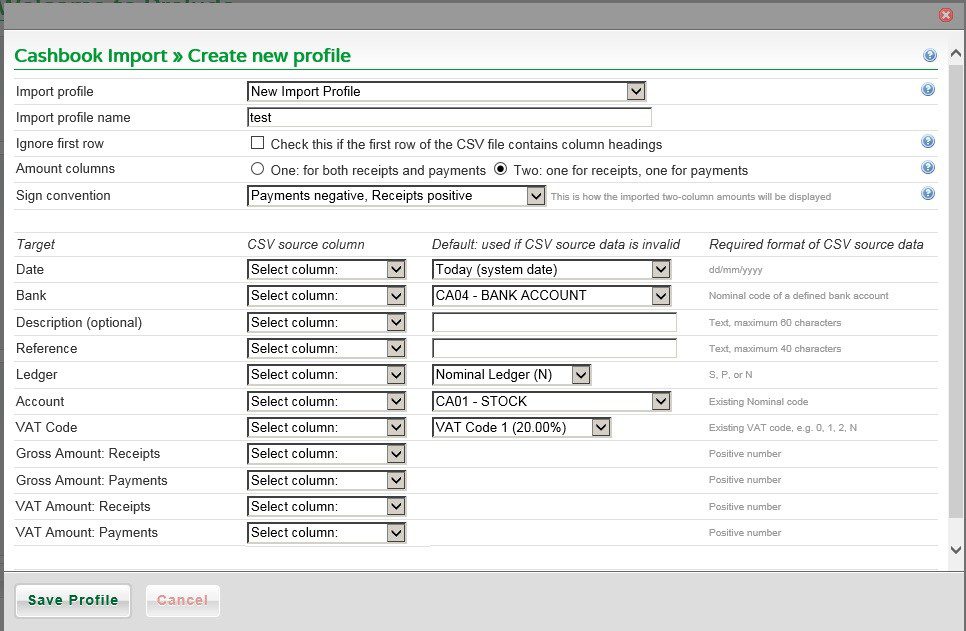
- Select either single or dual receipts and payments columns.
- Select source fields from picklists and select defaults if appropriate. A clean error-free CSV file is always preferable.
- If CSV file contains headers tick Ignore first row.
- Note sign convention in the source CSV data and select accordingly.
- Click Save Profile to save your newly-created profile.
With the two-column method for receipts and payments two additional CSV source columns are added to the display.
The standard options are:

Many banks provide export to CSV file from their internet banking. Using the format outlined in the form it should be easy to create a CSV file – ensure you can identify which ledger is correct for the transaction.
Click Next to select the source file (before this screenshot it has search button to find CSV file).
Select the source CSV file – as above and click Next again.
A preview is then displayed.
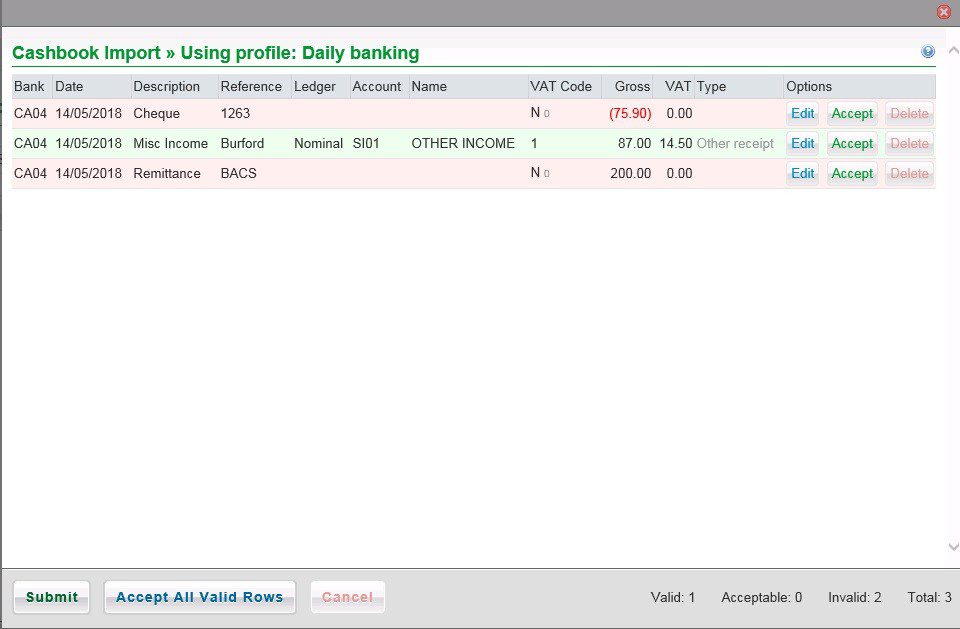
Edit any details as required and, if you can’t accept all the rows, click Accept on the rows you can.
Green confirms the source or edited data is in a valid format.
Amber confirms that the source data was invalid and has been made valid by the defaults as defined in the import profile.
Red confirms that the source data was invalid and must be edited or the row deleted before the import can proceed.
Click Accept all valid rows to set all Amber rows to Green.
When all rows are Green, the import can proceed. Click Submit.
CSV File
Column 1 – A – Date – dd/mm/yyyy
Column 2 – B – Bank – as per your chart of accounts – up to 8 characters
Column 3 – C – Description – up to 60 characters
Column 4 – D – Reference – up to 40 characters
Column 5 – E – Ledger – Nominal/Sales/Purchase – enter N/S/P
Column 6 – F – Account – within ledger – up to 8 characters
Column 7 – G – VAT Code – as required – must exist in VAT Table
Column 8 – H – Gross amount
Column 9 – I – VAT amount
If using the two-column receipts and payments –
Columns 1 – 7 as above
Column 8 – Gross amount – receipts
Column 9 – Gross amount – payments
Column 10 – VAT amount – receipts
Column 11 – VAT amount – payments
Note: Whilst outside the scope of this help file you can use Auto-entry and Receipt Bank software to assist with speedier input.
Resume from failed or aborted imports
If the import fails or is aborted for any reason, you can resume and pick up where you left off.
If any in-progress imports are found, a form will present them to give you the option to start afresh, resume one of them and optionally delete the others. There may be more than one import in progress in a multi-user database or if you have other imports in progress in other browsers or in other tabs in the same browser. Only delete the others if you are sure they can be deleted.
If one is identified as “current session”, it was started in the current tab in the current browser. Whichever import you choose to resume will overwrite the “current session” import as only one import can be in progress in one browser tab.
0 Comments