EPOS – Record Sales And Refunds
Overview
The EPOS module provides a complete package to allow users to manage consumer and trade retail businesses.
Each EPOS transaction is made up of a series of line items – the transaction is complete once all the line items have been input and payment has been validated and accepted. Users can input line items to the system automatically, using barcode scanners, or manually, by selecting product codes. The system will allow customers to pay by Cash, Cheque, Credit Card or a mix of these payment types.
Cash sales are recorded in the sales ledger as paid invoices and are posted as for sales invoices created through daybooks or via the SOP module.
Preparation:
The following list of possible preparation steps will help you decide if you need to do anything before processing and if you need help.
- Select a company – see Change Companies.
- Obtain an up-to-date customer list – see List Customers.
- Obtain an up-to-date nominal code list – see List Chart of Accounts.
- Ensure customer details are up to date – see Create & Edit Customer Accounts.
- For first-time use only: Set up and configure locations – see EPOS Parameters – Main Page.
- For first-time use only: Create sales ledger cash accounts for each location – see Create & Edit Customer Accounts.
- For first-time use only: Create user codes as required – see Create, Amend or Delete User Codes.
- For first-time use only: Create sales invoice, credit note & VAT and refund receipts – see Stationery Design.
- Ensure the stock file is up to date for price changes – see Create & Edit Products and Services.
- Ensure barcode and price codes details are up to date – see Create & Edit Barcodes.
- Set the default transaction date as required – see Change Default Accounting Date.
Processing – Sales
On the main menu click EPOS > Required Location Name > Sales Entry.
Select print options from the form which now opens – see Printing Reports.
Once this is complete, Click OK to open EPOS User ID form as required. The system will validate input against entered user codes. The form will be closed if the input is invalid.

Enter User ID & Click OK to display form.
Complete form details – see EPOS Entry form – Products Page below.
Click OK to close form and produce invoice or click Cancel.
Processing – Refunds
Processing – Refunds
On the main menu click EPOS > Required Location Name > Sales Refund
Select print options from the form which now opens – see Printing Reports.
Once this is complete, Click OK to open EPOS User ID form as above. The system will validate input against entered user codes. The form will be closed if input is invalid.
Enter User ID & Click OK to display form.
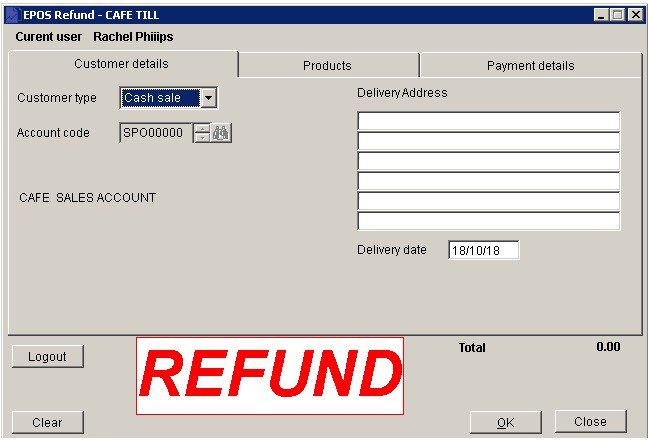
Complete form details – see that this is the same as for sales except that the screen is clearly marked as “REFUND”
Click OK to close form and produce refund receipt or click Cancel.
Balancing/Reconciliation:
Print payment analysis at close of business – see Print Till Summaries.
Filing:
One copy of Invoice to be filed in number order with daybook listing for that day’s input – see Print Till Summaries. A refund will show as transaction type CRN with a negative value.
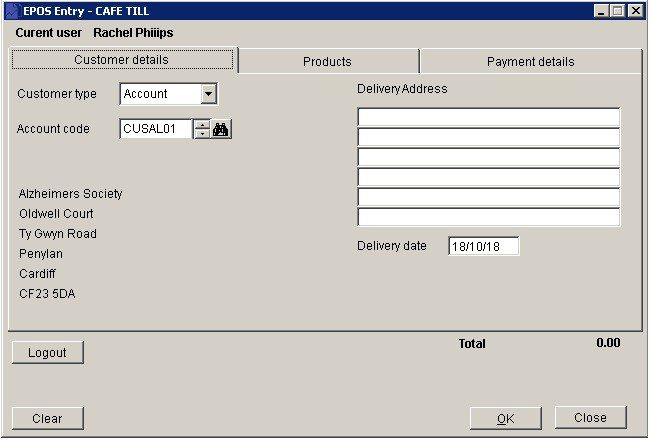
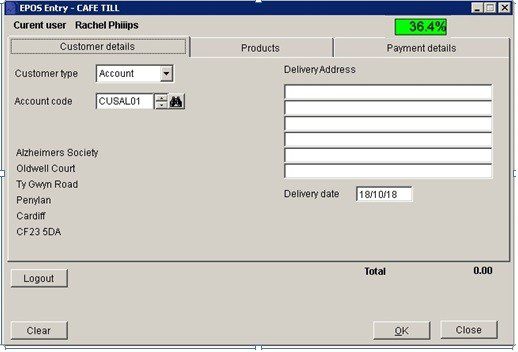
- Customer Type: Select Cash or Account.
- Account: If Cash, field will automatically contain SL Cash account for that location – see EPOS – Location Settings Form.
- If Account select Customer.
- Input Delivery Address, Delivery Date and select Payment type.
- Date:Either: Manual entry formatted as DD/MM/YY. Type over the parts of the date you wish to change – the system will skip over the “/” part itself. If the date you enter is invalid; the cursor will return to the start of the date and await a valid entry, or; click on the field to highlight data – white on a blue background – then right click to open the Calendar Menu – see Dates and Calendar.
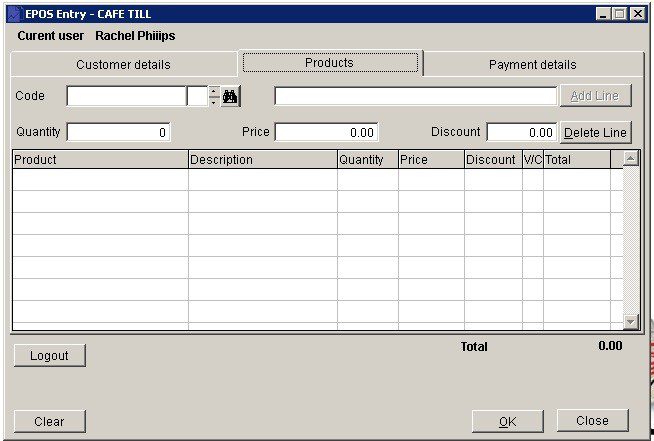
Code: Either: Swipe item barcode to populate field, or:
Either: Click on up and down arrows to scroll through list, and
Click OK or press Return when required selection is displayed, or:
Search for required code.
Click to populate field.
Click Add to add to grid.
- Quantity – Price: Automatically populated from stock file data.
- Set EPOS Edit Price parameter to allow user overwrite – see EPOS Parameters – Main Page.
- Discount: Automatically populated from stock file data.
- Set EPOS Edit Discount parameter to allow user overwrite – see EPOS Parameters – Main Page .
- Delete Line: Either: click to delete the most recently added line, or; click on a Line Item to select, then click to delete line.
- Clear: clears all.
- Nett – Gross: Accumulates after each line is added.
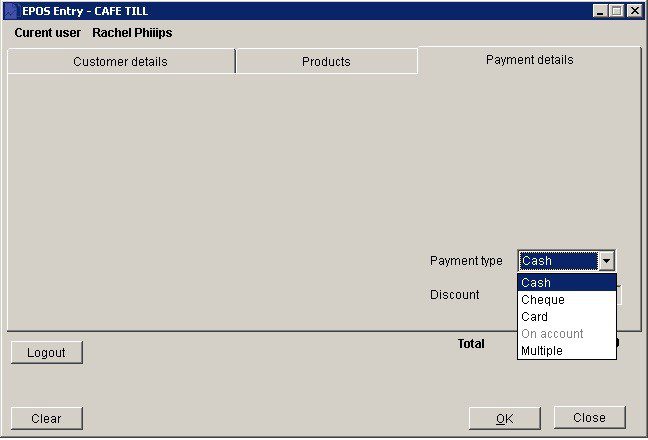
If Multiple selected click to open till, and open Split Payment form – below. Select Payment Type from drop down; Input amount tendered; click OK to accept;
Continue until Amount Due is zero; receipt will be printed.
Check Stationery Design layout – you may wish to add logo, delivery address and other detail to receipt.
If a single Payment Type selected click to print a saIes invoice, and open Amount Due form. For cash, enter the amount tendered and the change due will be calculated. for cheques or card the form is the same but payment type different.
Multiple payment –
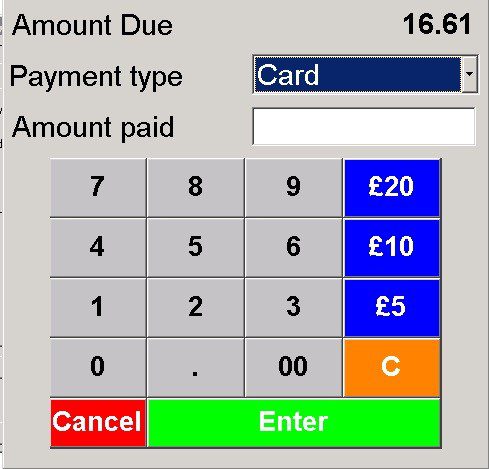
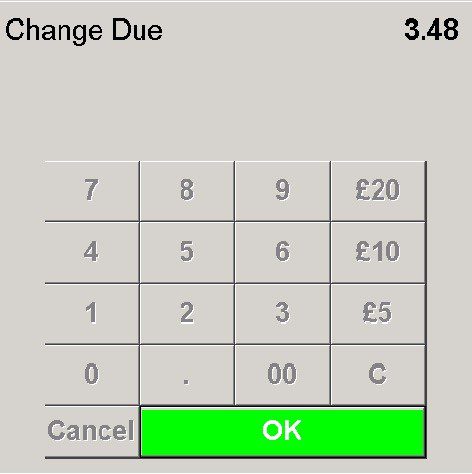
Cash payment –
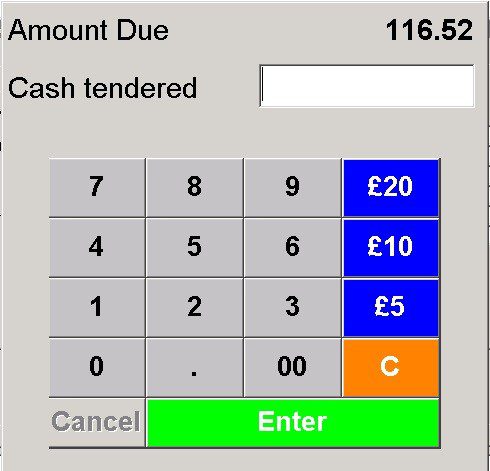
Input Value tendered; Click OK to open till and display Change to be returned.
The refund form operates in the same way, but is headed and badged with ‘REFUND’
Note: the tab order can be changed in View > Parameters > EPOS if you wish to select product first e.g. when using barcodes.
On request there is an option to show the margin on the invoice value – see Sales Ledger – Produce Invoices. Contact Prelude Accounts if this will be useful.
See Sales Ledger – Produce Sales Invoice for more details about Margin Display.
0 Comments