Connect Your Email Client To Your Exchange Mailbox
Exchange Server is a Mail, Calendar, Contacts, Tasks and Notes server developed by Microsoft. It is a centralised database that enables you to connect from multiple devices in multiple locations to see a complete synchronised view of your mailbox. On this page we will explain how to connect your Email Client to your mailbox. Note that ‘Email Client’ is the general term for any software program, application or app that connects to an email mailbox.
Table of Contents
Access your Mailbox from anywhere with OWA
OWA (Outlook Web Access) is the web client for Microsoft Exchange. It enables you to access your mailbox from any browser (e.g. Chrome, Edge, Firefox, Internet Explorer) on any device with an internet connection (e.g. PC, Mac, laptop, tablet, smartphone), wherever you are. As such it is the quickest and easiest way to access your mailbox and so is the ‘go to’ client for when you are on the road or just away from your desk or if your usual email client is not working.
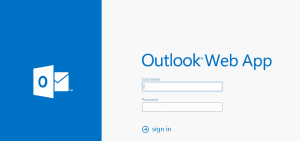
To connect, simply enter the Exchange Server URL in your browser’s address bar, (https://exchange.appsservers.net/owa). Click the address bar image to open a new browser tab with our OWA.

Enter the username and password you were provided and click sign in:
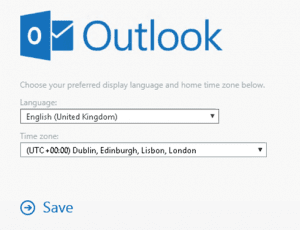
When you use OWA for the first time you will be presented with the following regional settings page. Select your preferred settings and press Save. You can change these settings any time in your profile options.
The OWA user interface might be unfamiliar at first, but basic tasks such as sending and replying to emails are simple. To compose a new email, click New mail and type the email address of the recipient etc. When complete, click Send. The best way to get to know OWA is to play with it.
Although you can use many browsers (e.g. Chrome, Firefox), at the time of writing only Internet Explorer-based browsers support all the features such as searching your mailbox and notification of new emails.
Connect to your Mailbox with Outlook
These instructions apply to Outlook 2019 and later versions. Older versions of Outlook have been deprecated by Microsoft and will no longer receive support or maintenance; so, we have removed their instructions from this article. If you use an older version of Outlook, you must upgrade to the latest version to continue to receive updates and support. You should plan to do this, to minimise inconvenience and to adapt to any required adjustments to your current workflow.
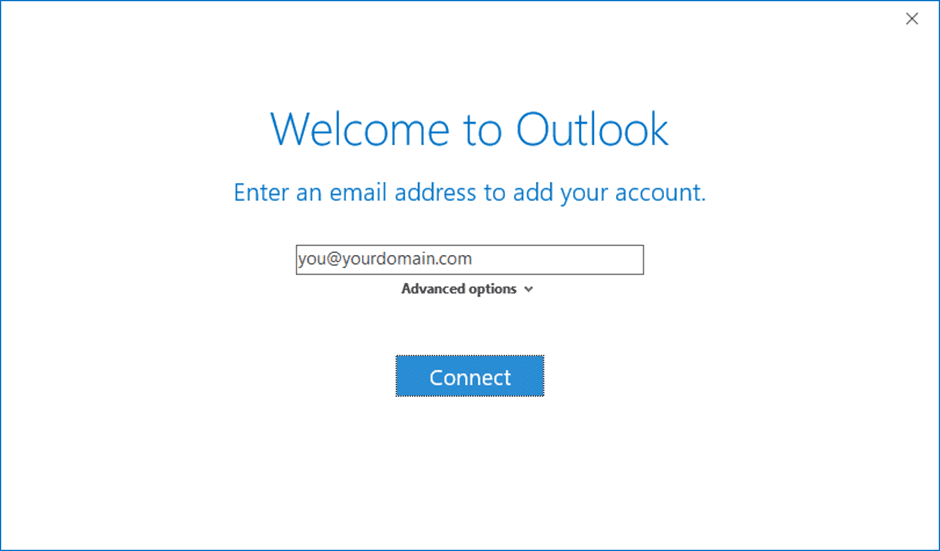
Enter your email address in the Welcome to Outlook form and click [Connect]:
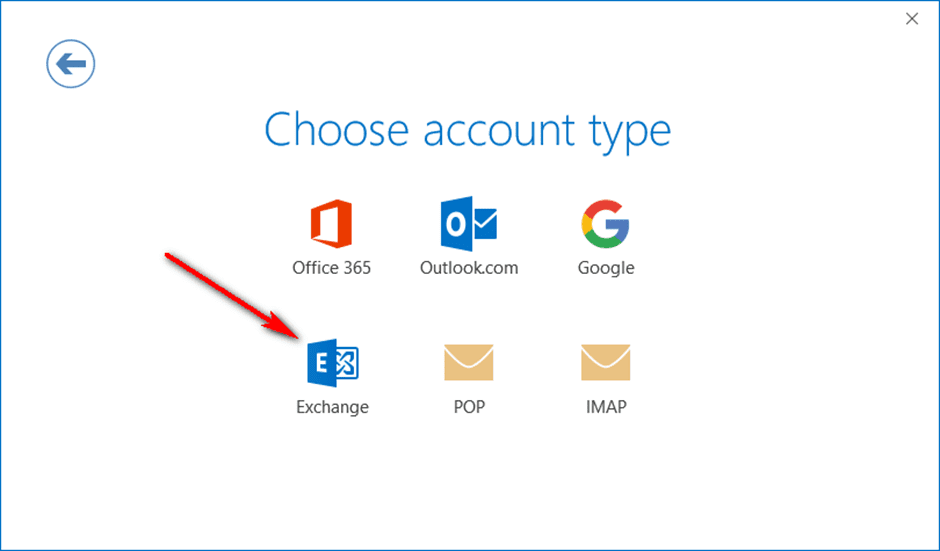
Choose Account Type: click Exchange
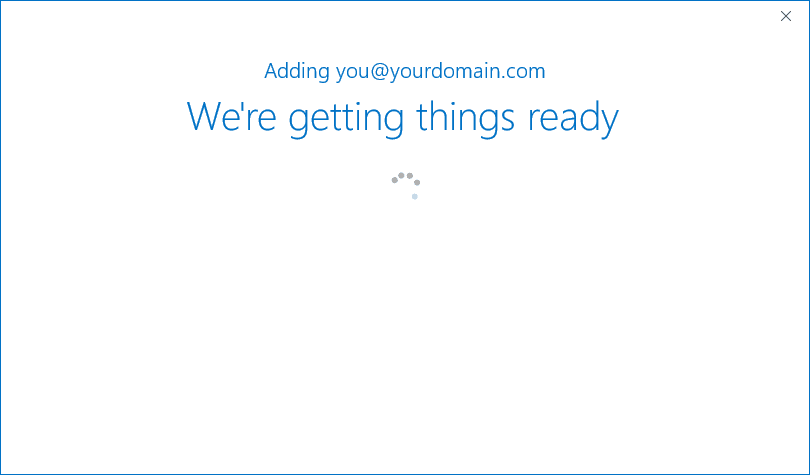
We’re getting things ready can take a while, please be patient . . .
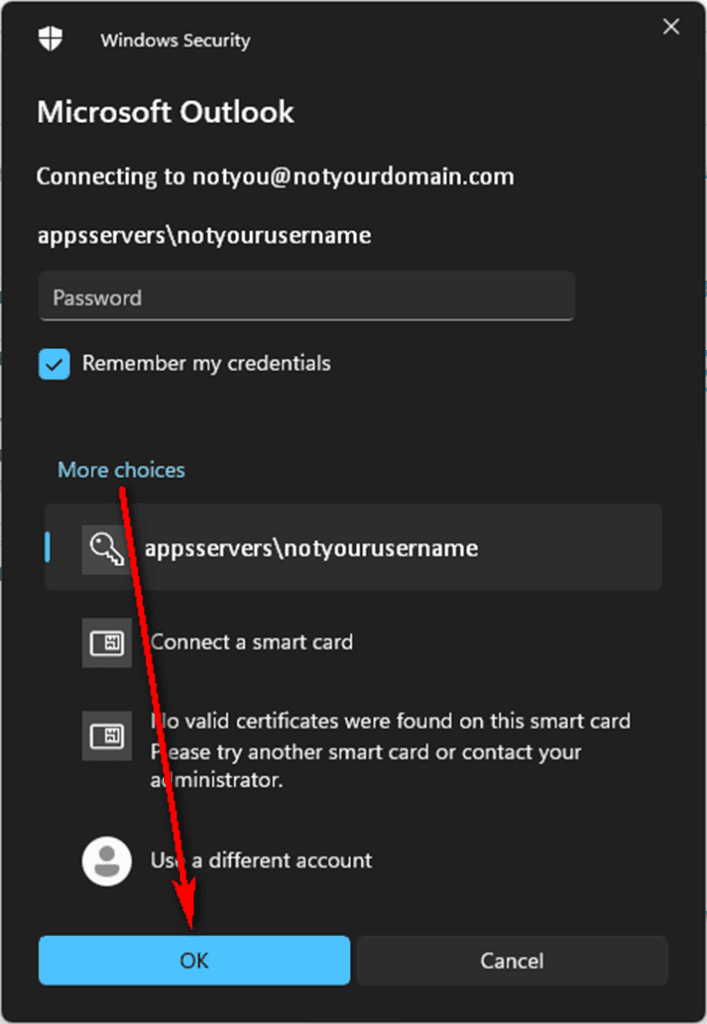
Sometimes, the Connecting to form is correctly populated with your user details,
- Connecting to [email protected]
- appsservers\domain.username
in which case, enter your Password, check the Remember my credentials box (so you shouldn’t have to do this again), then click [OK].
If it isn’t correctly populated (only Microsoft knows why), click More choices, then click Use a different account to then enter your correct user details (as we provided in your Instructions email), check Remember my credentials and click [OK]:
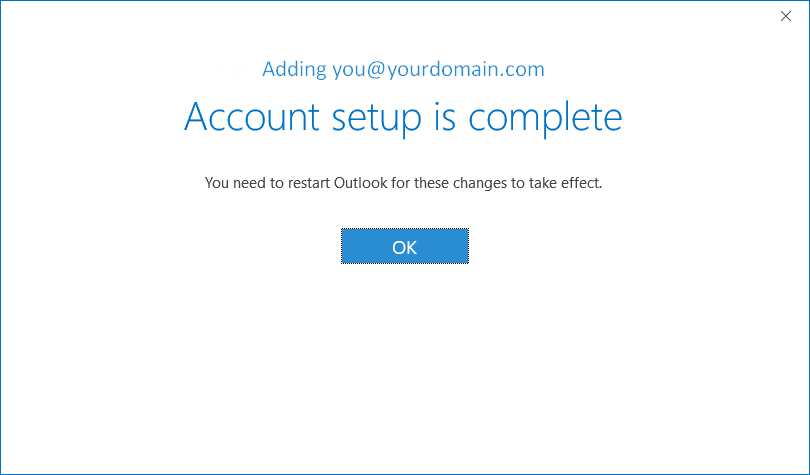
When Account setup is complete, click [OK] to return to Outlook, after which you might need to restart Outlook to connect and synchronise with your Exchange mailbox:
Connect to your Mailbox with the Outlook App for Android
Note: If you have a work account that requires the Intune Company Portal app, install it from the Google Play Store before setting up Outlook for Android. Your IT admin may or may not also require you to Enrol your Android device in Intune.
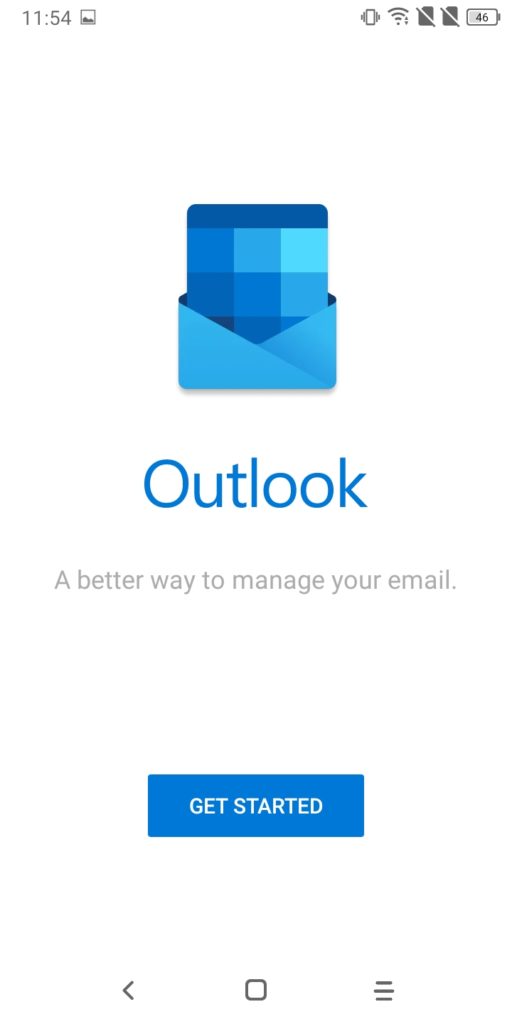
Install the Outlook App for Android from the Google Play Store and then open it. The icon looks something like this:
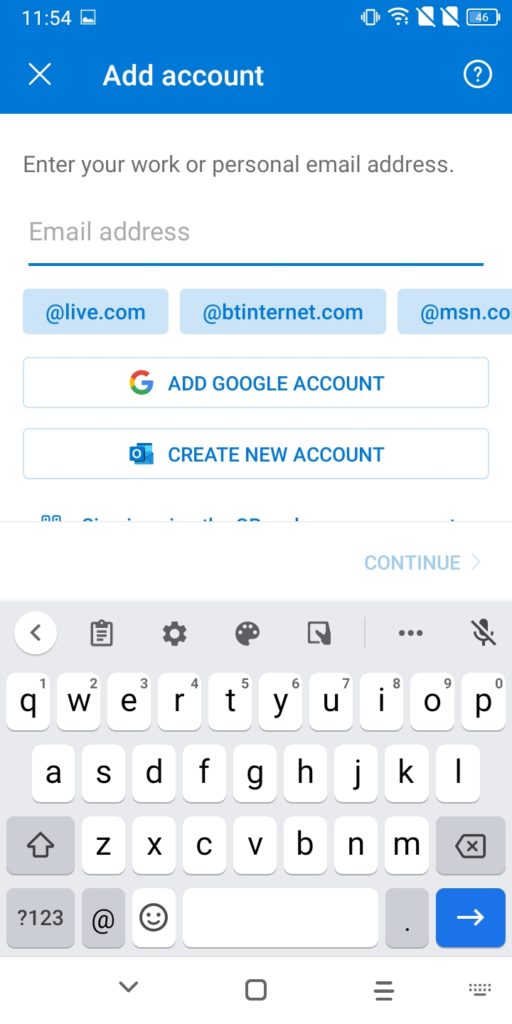
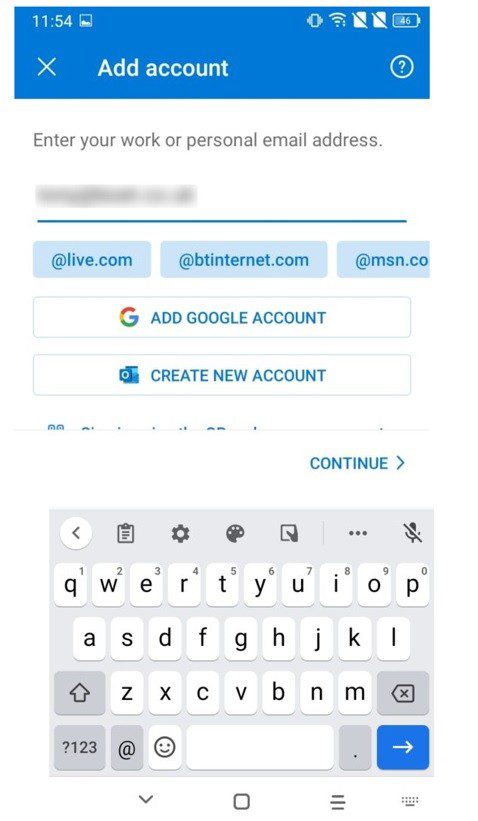
If this is your first use of the app, it should open with GET STARTED followed by an Add Account page. Otherwise, if you have already connected the app to other mailboxes (accounts), from the menu, select Settings > ADD MAIL ACCOUNT. Then enter your email address using the on-screen keyboard and click CONTINUE:
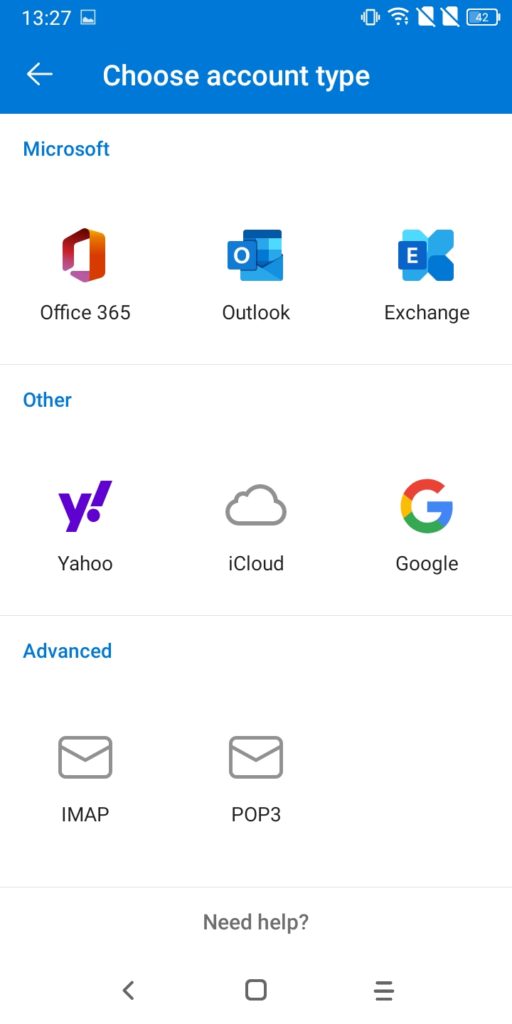
If you are asked to choose your account type, click Exchange:
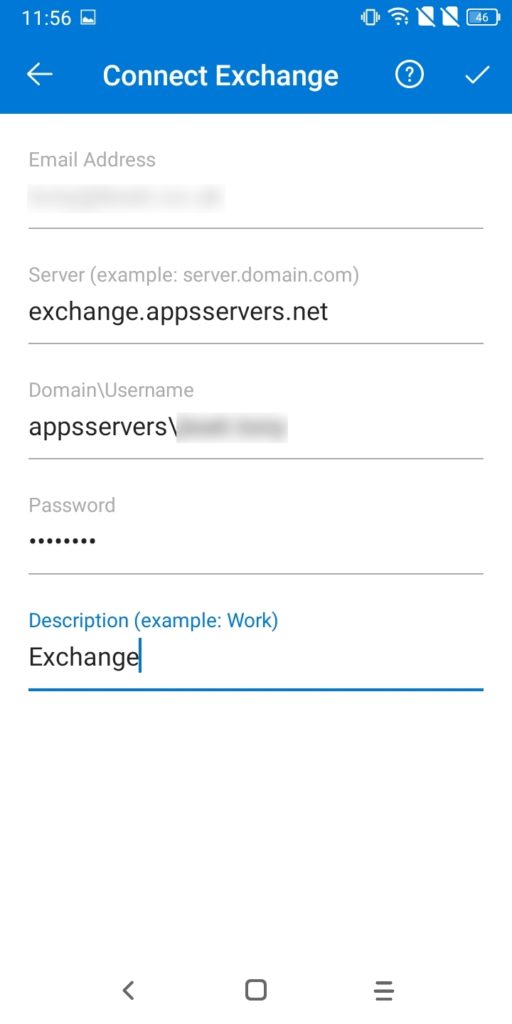
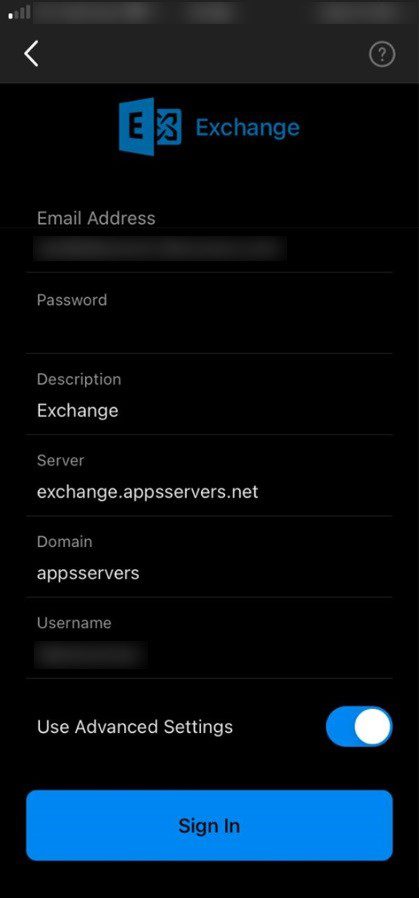
Enter your account details as provided by us. You might have to enter your email address again.
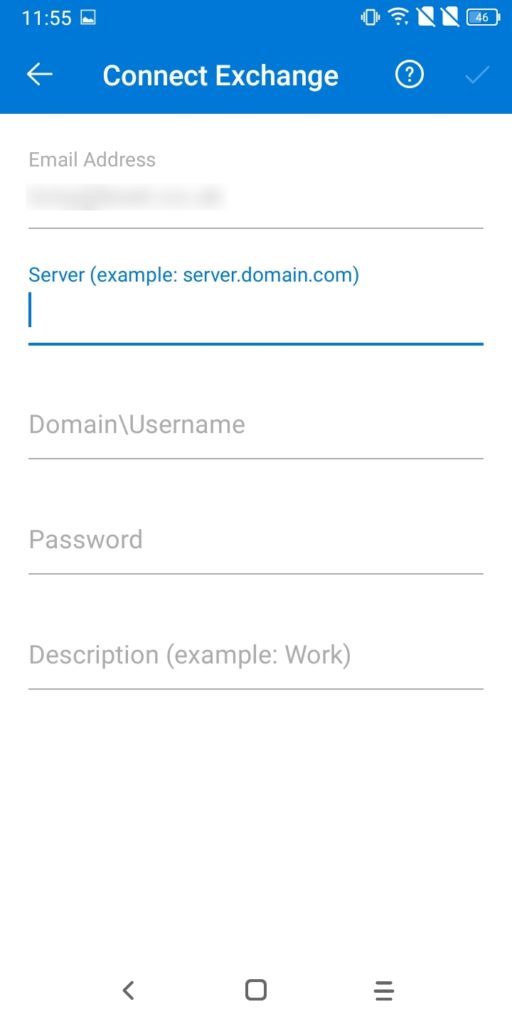
Description is your choice but take care to enter Email Address, Server, Domain\Username, Password correctly, with your specific details in place of the obscured text (i.e. Email Address, Username and Password). Server and Domain\Username must be exactly as in the screenshot below. Particularly, note the double ‘s’ in appsservers and backslash ‘\’ in Domain\Username. The previous sections provide more information as to why this is important.
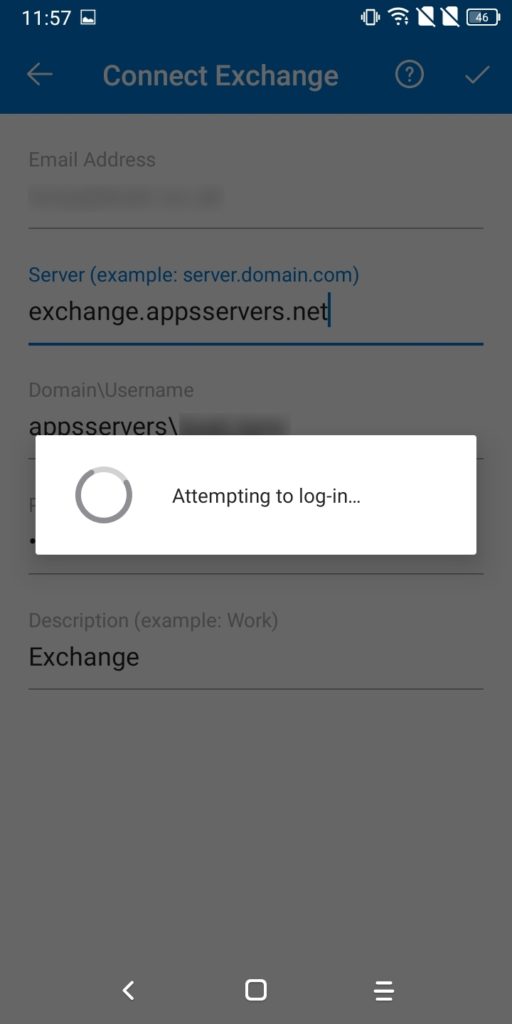
Click the tick at the top right of the screen, after which you will see Attempting to log-in … if you have entered your details correctly.
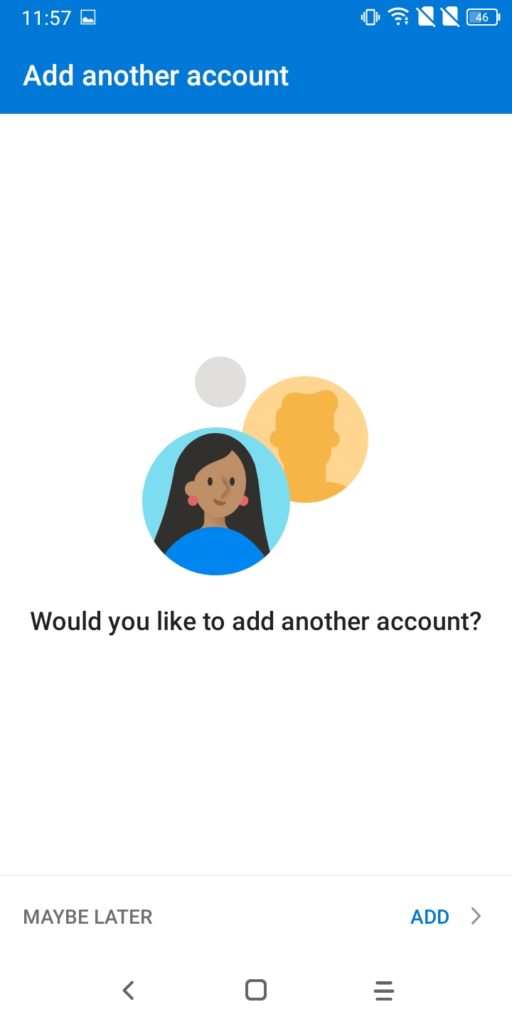
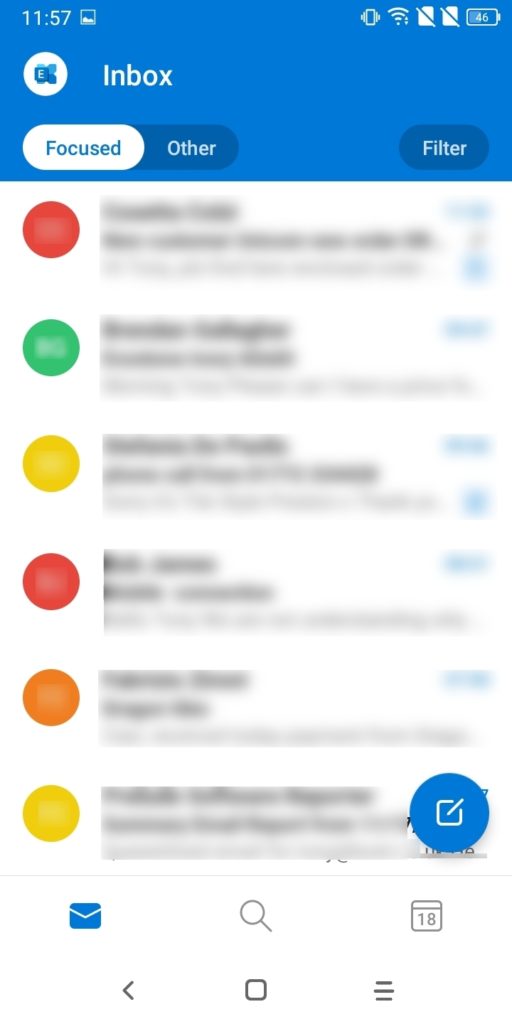
Then either click ADD to add another account or MAYBE LATER to go to the Inbox display, which will start populating with your messages.
Connect to your Mailbox with the Outlook App for iOS
Note: If you have a work account that requires the Intune Company Portal app, install it from the App Store before setting up Outlook for iOS. Your IT admin may or may not also require you to Enrol your iOS device in Intune.
Install the Outlook App for iOS from the iOS App Store and then open it. The icon looks something like this:
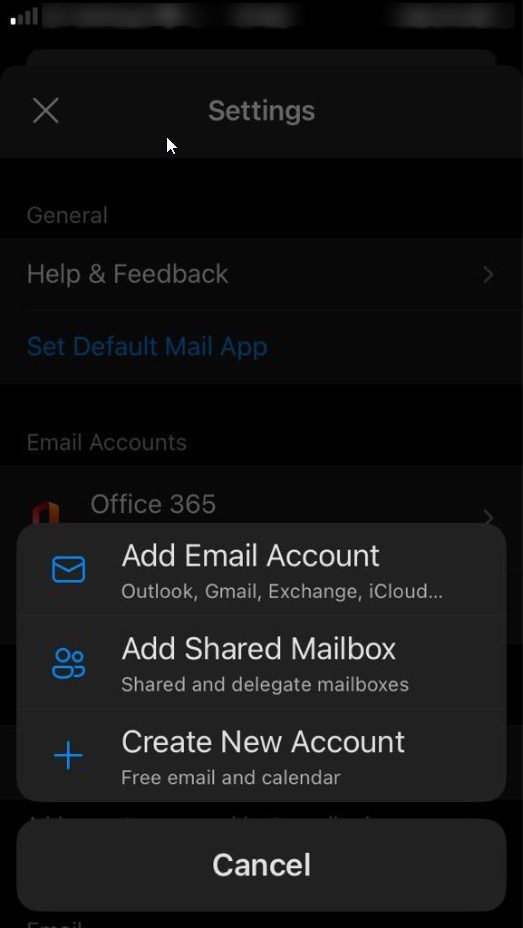
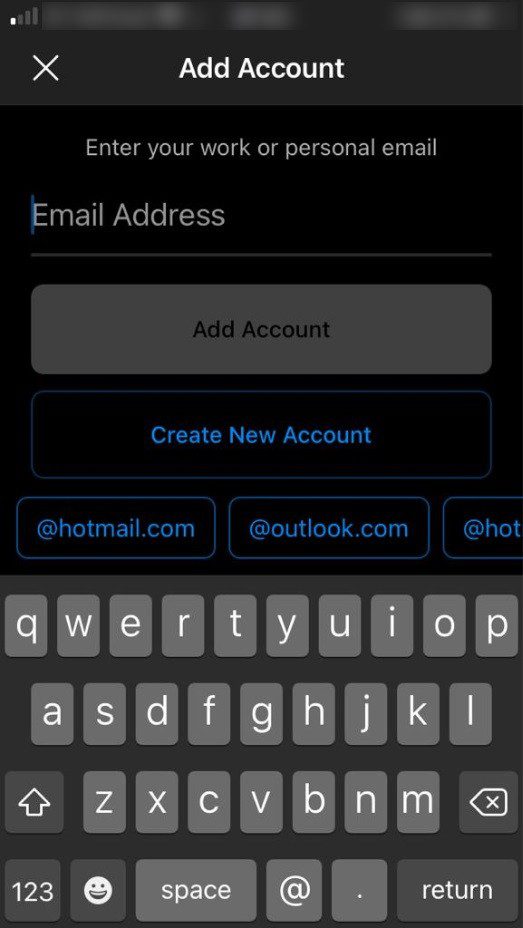
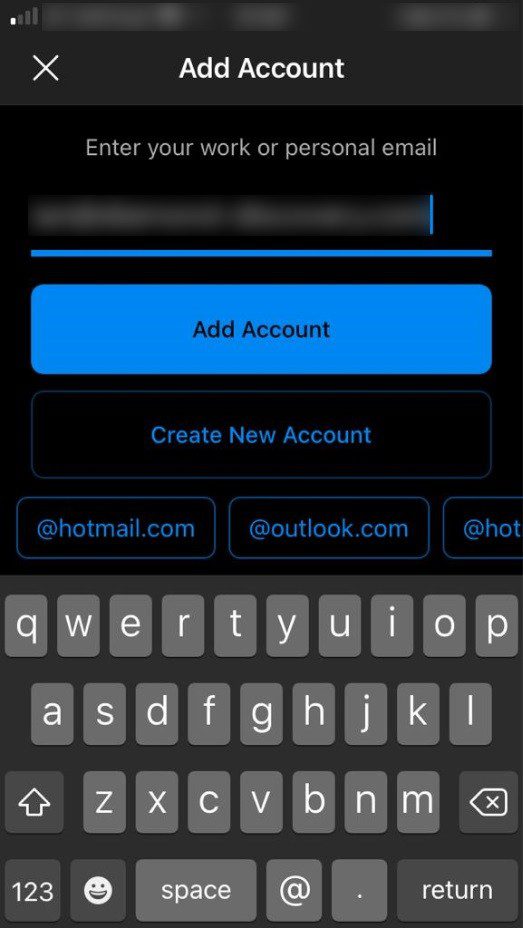
If this is your first use of the app, it should open with an Add Account page. Otherwise, if you have already connected the app to other mailboxes (accounts), from the menu, select Settings > Add Email Account. Then enter your email address using the on-screen keyboard and click Add Account:
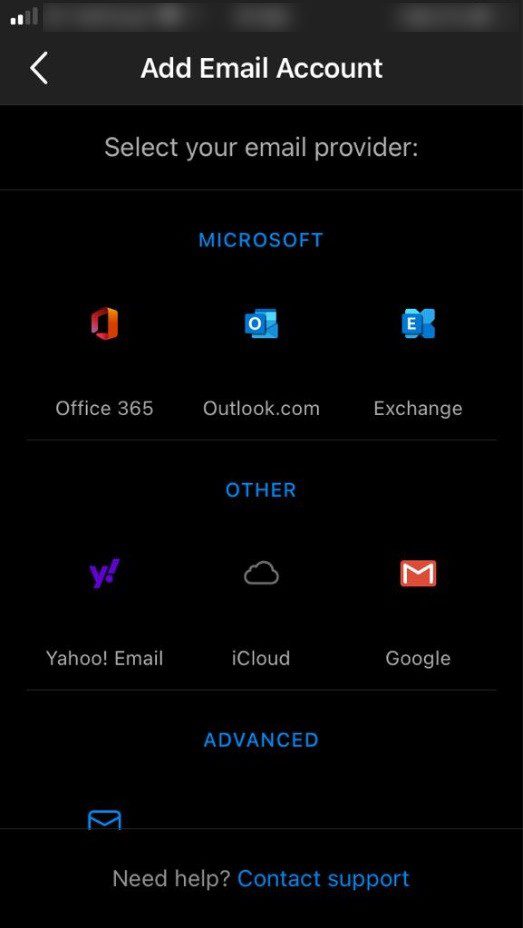
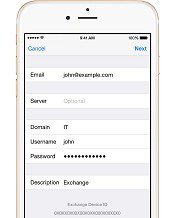
If you are asked to select your email provider, click Exchange:
Enter your account details as provided by us. You will probably have to enter your email address again. Description is your choice but take care to enter Email Address, Server, Domain, Username and Password correctly, with your specific details in place of the obscured text (i.e. Email Address, Username and Password). Server, Domain and Username must be exactly as in the screenshot below. Particularly, note the double ‘s’ in appsservers. The previous sections provide more information as to why this is important. Click Sign In.
You may get a Connection Warning, which is incorrect and is nothing to worry about – just Microsoft being paranoid. Click Log-in.
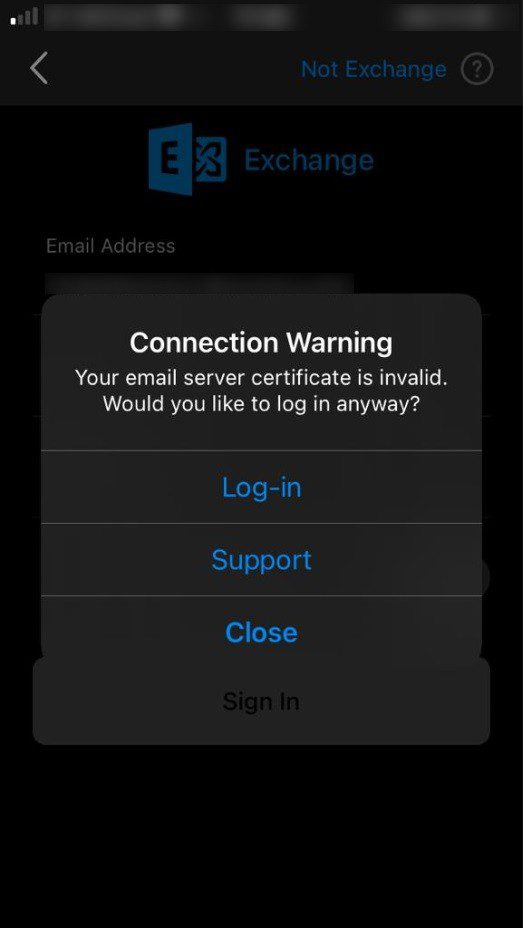
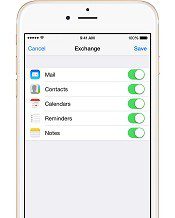
If you have entered your account details correctly, the app will soon return to the Inbox display and start populating it with your messages.
Connect to your Mailbox with the Android Mail client
Devices running the android operating system include “ActiveSync” like connectivity for Microsoft Exchange and support most if not all of Mail, Contacts, Calendars, Reminders and Notes sync directly with the server. Configuration screens may differ for different devices and different versions of android, but the following instructions and screenshots should be clear.
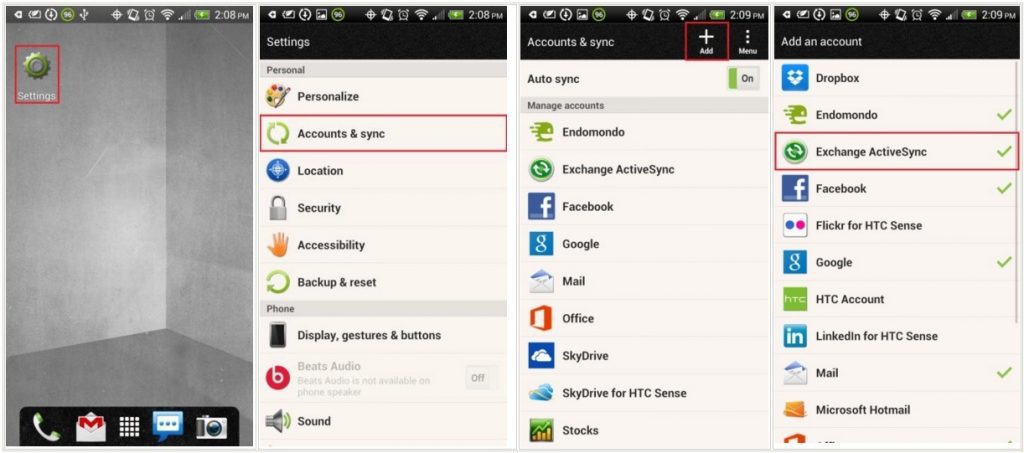
To start, Go to Settings > Accounts & Sync > Add Account > Exchange
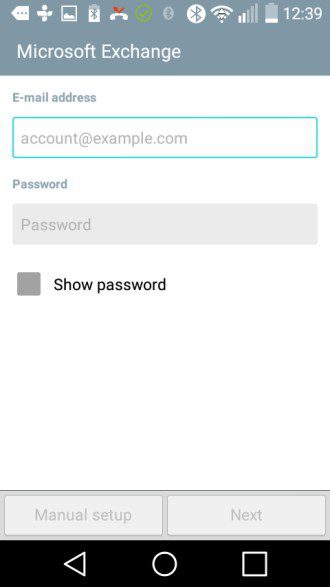
Enter your information
Enter your email address as provided to you, then
Enter your password as provided to you
press ‘Next’
Connect to the exchange Server
- Email Address: This should still be populated from previous
- Server Address: Enter ‘exchange.appsservers.net’
- Domain: Enter ‘appsservers’
- Port number: This should be pre-populated with 443
- Username: Enter your username as provided to you
- Use secure connection (SSL): This should be ticked
If your device does not include a specific field to enter the Domain name, enter the
Username in the form appsservers\username, i.e. with a backslash () between the domain name and your username.
Press ‘Next’
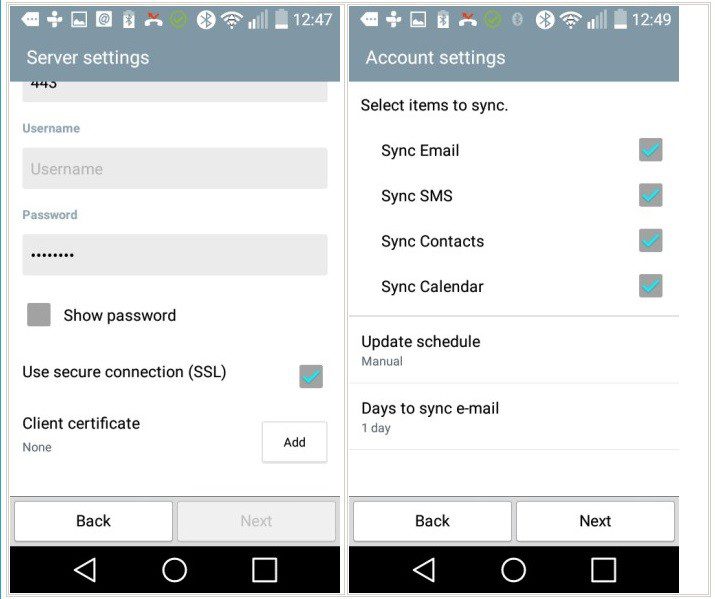
Sync your content
You should, at least, be able to sync Mail, SMS, Contacts and Calendar
Select the content you want and press ‘Next’
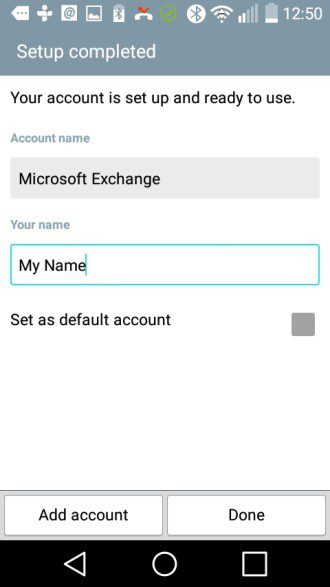
Name your Account
Finally, enter your name as you want it to appear in outgoing emails and a name for the account that you are creating and press ‘Done’
Connect to your Mailbox with the Apple Mail App for macOS
1. Open System Settings
- Click the Apple menu () in the top-left corner.
- Select System Settings (or System Preferences on macOS Monterey and earlier).
- Navigate to Internet Accounts in the left-hand sidebar.
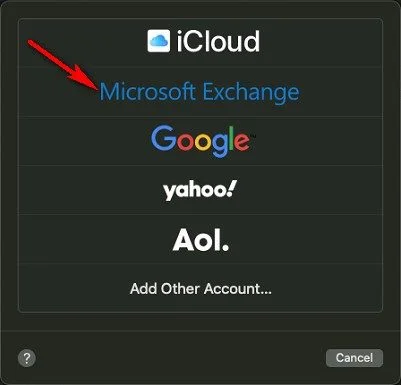
2. Add a New Account
- Click the Add Account button (+).
- Choose Microsoft Exchange from the list of available account types.
3. Enter Basic Account Information
In the initial prompt:
| Field | Entry |
|---|---|
| Name: | Your name (e.g., John Doe) |
| Email Address: | Your Exchange email address |
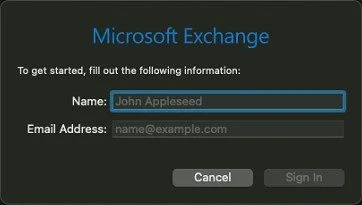
- Click Sign In to proceed.
- macOS will use this basic information to identify the host server of your Exchange mailbox. This might take a while, after which it will progress to the next form.
4. Choose Authentication Method
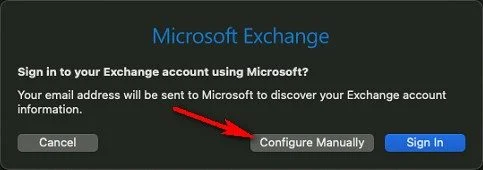
macOS next offers to sign in automatically, but, unless we have advised you otherwise (e.g. if we host your mailbox in Microsoft 365), you should click Configure Manually on this form:
Then enter the following details on the next form:
| Field | Entry |
|---|---|
| Name: | Your name (e.g., John Doe) |
| Email Address: | Your Exchange email address |
| Password: | Your Exchange password |
- Click Sign In or Continue.
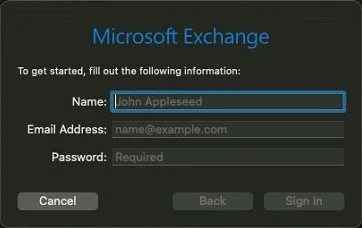
We’re not done yet, because that form does not include all the required information. They do not make things easy!
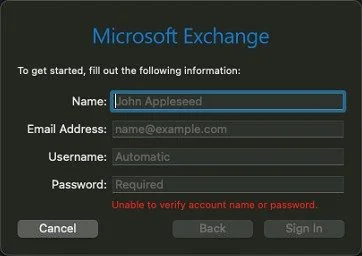
When it fails, you will be presented with the following form, which does include all the required information, i.e. all of the above plus Username.
Enter your username as we provided it to you, e.g. appsservers\your.username, and recheck all the previously entered fields, because the app sometimes changes the field contents (e.g. Email Address / Username). overwriting one with the other:
| Field | Entry |
|---|---|
| Name: | Your name (e.g., John Doe) |
| Email Address: | Your Exchange email address |
| Username: | appsservers\your.username |
| Password: | Your Exchange password |
- Click Sign In or Continue.
5. Select Services to Sync
After successful authentication, macOS will ask which services you want to enable:
- 👥 Contacts
- 📆 Calendars
- 🔁 Reminders (optional)
- 📝 Notes
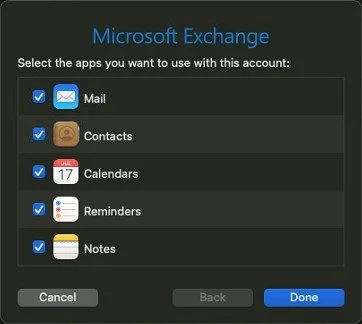
Select only the services you need. For Mail-only use, just check Mail.
Click Done to complete account setup.
6. Launch Mail and Start Syncing
- Open the Mail app from the Dock or the Applications folder.
- Your Exchange inbox and folders will begin syncing. Initial synchronisation may take several minutes depending on the mailbox size and network speed.
Troubleshooting & Best Practices
Common Issues & Solutions:
| Issue | Solution |
|---|---|
| Login fails | Double-check credentials, and verify server address with IT |
| App password required | If MFA is enabled, generate an app password in the Microsoft 365 portal (usually applies only if we host your mailbox in Microsoft 365) |
| Missing folders or slow sync | Wait a few minutes; go to Mail > Preferences > Accounts to adjust sync settings` |
| Calendar not syncing | Ensure the Calendar option is enabled under Internet Accounts |
💡 Tips:
- Use Activity Monitor to check if background processes are running (Mail sync).
- To force re-sync, remove the account and re-add it.
- If using a corporate-managed Mac, ensure Mail app access is not restricted via MDM (Mob`ile Device Management).
Connect to your Mailbox with the iOS Mail client
Apple devices include “ActiveSync” like connectivity for Microsoft Exchange and support Mail, Contacts, Calendars, Reminders and Notes sync directly with the server.
Configuration screens may differ slightly for different devices and different versions of iOS (7 and above), but the following instructions and screenshots should be clear.
To start, go to Settings > Mail > Contacts, Calendars > Add Account > Exchange

Enter your information –
- Email – enter your email address as provided to you
- Password – enter your password as provided to you
- Description – enter a suitable account description
- Press ‘Next’
Your device will display ‘Verifying‘ while it is connecting to the server, which might take few minutes.
If any error message is displayed, press ‘Continue‘ to progress to the next screen.
- Connect to the Exchange Server
- Email: This should be populated from previous
- Server: Enter exchange.appsservers.net
- Domain: Enter appsservers
- Username: Enter your username as it was provided to you
- Password: This might still be populated from previous
- Description: This should still be populated from previous
- Press ‘Next’
- Sync your content
- You can sync Mail, Contacts, Calendars, Reminders and Notes.
- Select the content you require and press ‘Save‘
To edit your Exchange settings, go to Settings > Mail, Contacts, Calendars, select the Exchange account and edit the settings as required. For example, you can set up automatic out-of-office replies and change the Mail history you want to sync (the default is seven days).
Older versions of iOS
If your setup screens don’t look like these you are probably running an older version of iOS. If you cannot update your version of iOS the following instructions will probably apply. Reminders and Notes might not be supported on your device.
Go to Settings and scroll down to Mail, Contacts, Calendars and select “Microsoft Exchange”.
- Enter your full email address.
- Do not enter anything in the Domain field.
- Enter the user name in the format domain\user. The domain in all cases is the word appsservers.
You must enter the slash. Please note the slash on the first keyboard is the wrong way around (/) and if entered with this key WILL NOT WORK. For the correct slash () press the key marked +#= in the bottom left corner of the keyboard display.
- The user is your username as provided to you.
- Enter your password as provided to you and, when prompted, enter the server name, which is exchange.appsservers.net.
PUSH mail is enabled by default. So, if you want to disable it, change the frequency etc. whilst abroad or on holiday you must select Settings, Fetch New Data and make the necessary changes there.
Connect to your Mailbox with the Windows Mail client
Don’t do it!
As of late 2024, Microsoft has implemented significant changes to its email services and applications that may negatively impact many users. The default Windows Mail app is no longer supported or maintained by Microsoft, and it will be replaced by the new Outlook app. This new Outlook app does not support Microsoft Exchange (this may change in future, but there is currently no indication on this from Microsoft), which means that users who rely on the Windows Mail client to access their Exchange mailbox must find an alternative solution for their email services.
Don’t confuse the new Outlook app (which is provided with the Windows operating system) with the existing Outlook app (which is part of the Microsoft Office suite of apps). They are different apps, even though they have the same name. Only Microsoft knows why they have done this, which is confusing a lot of people . . .
You cannot connect to your Exchange Mailbox with the new Outlook app, but you can connect with the existing Outlook app, instructions for which are in this article.
Connect to your Mailbox with other email clients
Windows Mail, Thunderbird, Outlook Express, Eudora, Outlook versions lower than 2003, MAC Mail, mobile devices etc.
These email clients can only connect to your Exchange mailbox using either the POP3 or IMAP protocol and can therefore only be used for email. All other data types (Calendar, Contacts, Tasks) are not available to these email clients. The following table summarises the main differences between POP3 and IMAP.
| POP3 | IMAP |
| Post Office Protocol version 3 | Internet Messaging Access Protocol |
| This is better if you use only one device to check your email. | This is better if you use more than one device to check your email. |
| Your emails are downloaded from the mail server to the particular device you are checking it on. | Your mail always remains on the mail server. |
| Allows you to keep a large history of email messages, limited only by the disk capacity of your device. | The history of email messages you can keep is limited by your mailbox quota size on the mail server, although you can archive old messages and save them onto your local device manually. |
| Does not have a web interface, although some webmail providers, such as Yahoo, will let you check POP mail. | Has a web interface. If you are using NCF Webmail, for example, you are using IMAP. |
| New messages are downloaded in their entirety. You cannot view your messages until they have been downloaded. | Only the headers of new messages are displayed initially, so you can see all your mail faster. The full message, including attachments, is displayed only when you click on it. |
Choose your preferred protocol accordingly. We recommend using IMAP as this leaves the data on the server and any deletions you make on your computer will also be synchronised to the server. You will need the following settings:
- POP3/IMAP server name exchange.appsservers.net
- SMTP server name exchange.appsservers.net
- Username appsservers\ e.g. appsservers\joe.user
- Password your username password as provided to you
Other important settings are detailed below:
- The outgoing (SMTP) server requires authentication and uses the same settings as the incoming (POP3/IMAP) server.
- The incoming mail server (IMAP/POP3) requires an encrypted connection
- TLS: IMAP port 143; POP3 port 110
- SSL: IMAP port 993; POP3 port 995
- The outgoing (SMTP) server allows for unencrypted (None) or encrypted (TLS) connections. The default SMTP port is 25 but some ISPs (Internet Service Providers) block email on this port. Therefore, we also allow connections on port 587.
- None or TLS: SMTP port 25 or 587
- Port numbers to use: Webmail Port numbers 80, 443
Depending on your particular email client (e.g. Outlook Express, Outlook, Windows Mail) mobile device (e.g. iOS, Android, Windows), these settings will be presented in different places in the email configuration. Your connection will fail unless you apply all the relevant settings as detailed above.
0 Comments