File Menu – Stationery Design – Menus
During Stationery Design, the File and View menus are expanded and two new menus appear – Format and Report.
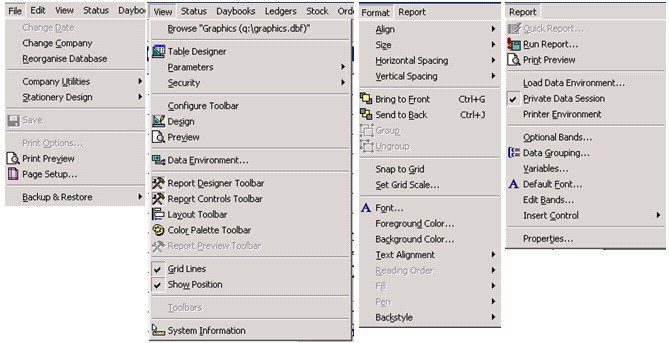
File:
Save – Saves any changes you have made to the current design.
Print Preview – Displays your design as it will be printed.
Page Setup – Modify paper size, margins, etc.
View:
Design – Toggles Design mode.
Preview – Toggles Preview mode – as if you’d selected Print Preview from the file menu.
Data Environment – The Data Environment (DE) contains the fields available for printing. When the DE is displayed you can drag fields from it onto your design
Toolbars – Display Report Controls, Layout and Colour Palette toolbars as required.
Grid Lines – Turns on or off a grid of lines that you can use to help line up your design. The grid size can be changed in the Format menu.
Show Position – Displays the current mouse co-ordinates or those of the currently selected field.
Format:
Align > Align Left Sides – Align Right Sides – Align Top edges – Align Bottom Edges – Align Vertical Centres – Align Horizontal Centres – Centre Horizontally – Centre Vertically – Sets the relative positions of the edges of selected objects. Objects will align to the edge of the outermost selected.
Size > To Grid – To Tallest – To Shortest – To Widest – To Narrowest – Sets the relative sizes of selected objects.
Horizontal Spacing > Make Equal – Increase – Decrease – Sets the relative spacing between selected objects.
Text Alignment > Left – Centre – Right – Sets Text Alignment within the selected object(s).
Mode > Opaque – Transparent – Sets object to make background visible or not.
Bring to Front – Move a selected object “in front” of another.
Send to Back – Move a selected object “behind” another.
Group & Ungroup – Selected objects become a single object. Grouped objects can be moved, sized and formatted together at the same time.
Ungroup reverses Group – breaks the Group into its constituent objects.
Snap to Grid – Object edges will align exactly with grid edges .
Set Grid Scale – Alter the horizontal and vertical spacing between the gridlines.
Font – Select font for use in object Text.
Foreground Colour – Set the colour of object Text.
Background Colour – Set the background colour of an object.
Report:
Title/Summary – Adds a Title and/or a Summary band to the document. A Title band will only print on the first page while a Summary band will only print on the last
Data Grouping – Adds Group bands to the document. Group bands enable you to print sections of documents according to a specified field, e.g. customer account number, together. Statements are usually run for all customers at once so tend to have a group on customer account number so that all transactions for a particular customer are printed on the same statement. Invoices are printed one at a time so don’t need grouping.
Variables – For Developer use only – Do not use.
Default Font – …Of any text to be displayed when an object is created.
Bands – Sets the height of each of the Header, Detail and Summary bands on the Design Form.
Insert Control – See Toolbars.
Private Data Session – For Developer use only – Do not use
Printer Environment – Tick to save the current printer settings with the document design. For example, the document will then always be printed by the same printer from the same paper tray in that printer. Saving the printer environment makes opening stationery design sessions much slower, especially if the printer may be on another machine on a large network. If not ticked, the document will be printed according to the user’s selections when printing.
Run Report – Prints the document using test data. It is usually best to use this as a final check, use Print Preview on the file menu to check your design through its development.