SOP – Enter Sales Orders
Preparation: –
The following list of possible preparation steps will help you decide if you need to do anything before processing and if you need help.
- Select a company – see Change Companies.
- Obtain an up-to-date customer list – see List Customers.
- Obtain an up-to-date nominal code list – see List Chart of Accounts.
- Ensure customers delivery address details are up to date – see Create and Amend Delivery Addresses.
- Ensure rep codes have been created as required – see Create, Amend or Delete Rep Codes.
- Ensure stock or product files have been updated for any changes in price – see Create & Edit Products and Services.
- For first time use only: On the main menu click View > Parameters > Sales Order Processing – see Sales Order Processing Parameters – General Page. Set parameters as required.
- Change the system date as required – see Change Accounting Date.
- For first time use only: design Sales Acknowledgement – see Stationery Design.
If using Matrix (Customer specific) Pricing: For first time use only: activate Matrix Pricing, select the Product Cost to be used for margin calculations and the Discounts to be used – see Stock Control Parameters – General Page.
Ensure that price matrices have been created/amended as required – see Create & Edit Customer Specific Pricing (Price Matrices).
Set minimum target margins for products and circulate to sales staff.
Processing:
On the main menu click Orders > Customers > Enter Orders to open form.
Select printer – see Printing Reports.
Click OK to confirm selection and open form.
Complete form details – see Sales Order Entry form – below
Click OK to update records and print order.
Filing:
Any source documents retained to be cross-referenced to order and dated.
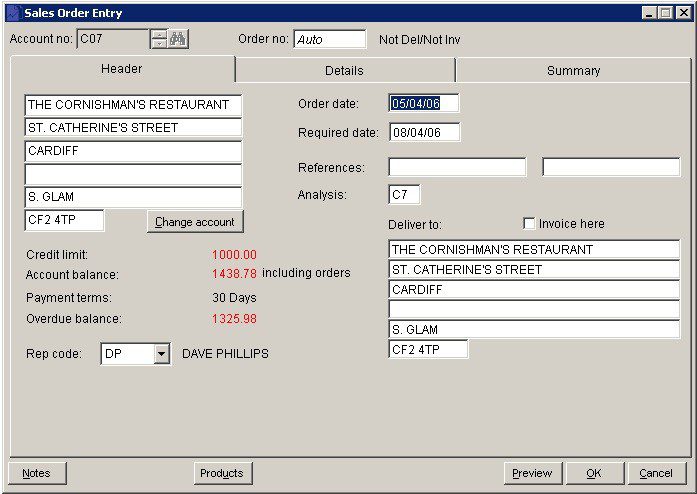
- Required: Defaults to parameter setting – see Sales Order Processing Parameters – General Page. Overwrite if customer delivery date is different to that shown. The order will be reported as being due for delivery on the date shown.
- References: 2 Fields – Type in a maximum of 16 characters in each field.
Change Account:
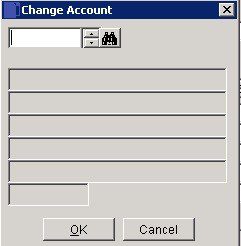
Select and click OK to update.
Deliver to: Use to select delivery address if different from invoice address, Check Invoice here if invoice to go to delivery address as well.
- Analysis: Maximum 2 characters account specific – customers can be grouped together for reporting. Defaults to code shown on ledger account – see Sales Reporting.
- Credit limit, Account Balance, Payment Terms and Overdue balance: These are shown in order to allow you to consider whether to process the order – if the overdue balance is not acceptable.
- Please note: the overdue balance will not include any credits not matched as they may refer to non-overdue amounts – in the above example the account balance including orders exceeds the credit limit and therefore actions should be taken.
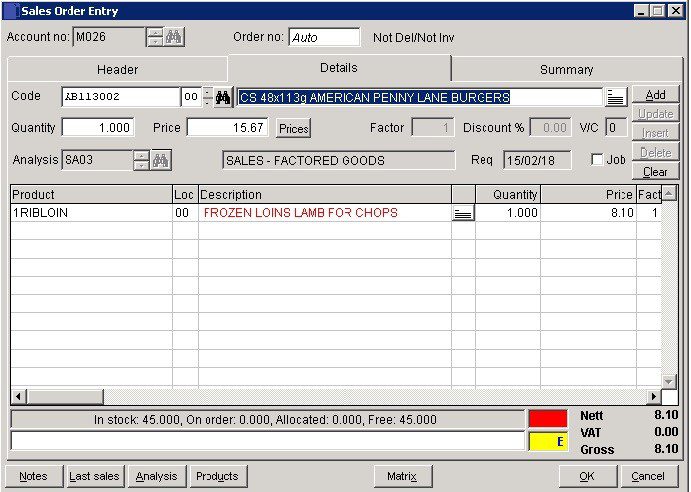
- Select or search for Product – Description displays – overwrite if required.
- Add Quantity, amend Price if necessary, amend VAT Code if necessary.
- Enter or select other detail, then click Add to place on grid.
- Line notes: Press elipsis … to display the line notes form. Enter notes that are specific to this line item in this transaction. The button turns red when a line item contains notes. Can be edited the same way as other grid items. Can be printed on stationery – see Include line notes in stationery design.
- Analysis: Select required nominal code.
- Note Stock availability.
- Update: Select line on grid to amend. Click on Update to take to top section – amend details and click on Update again to take updated details back to grid.
Prices: When price field is selected click to open Special Prices form.
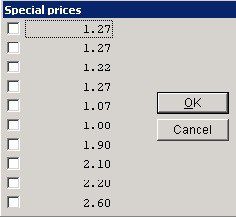
- Check price required and click OK to accept.
- Insert: After filling in details highlight line below where you want to insert and click on Insert.
- Delete: Highlight line you wish to delete and click Delete.
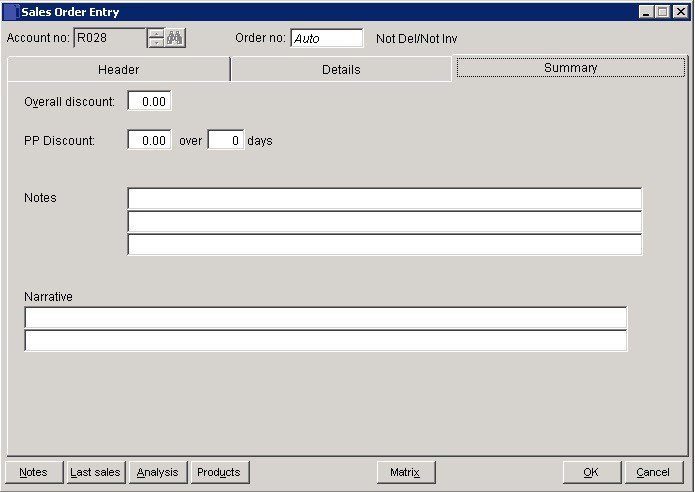
- Overall Discount: Discount applying to Total Net Invoice value.
- PP Discount: Prompt payment discount available for settlement within number of days from invoice date.
- Notes & Narrative: Text which can be displayed on invoices/credit notes as required by including these fields on your stationery design – see Stationery design.
- OK: Generate and print Sales Order.
- If Use document reprints field is checked in Parameters click Yes to reprint.
Search for existing details
Please refer to https://help.prelude.software/knowledge-base/cash-book-post-sales-ledger-receipts/ – bottom of page for details of search facility

0 Comments