Sending Emails Using A Different Email Address
This topic is based on Exchange mailboxes and using Outlook 2007. The principles outlined are equally valid with other versions of Outlook, Outlook Express, Entourage, Thunderbird, Mac Mail etc.
Your Exchange mailbox details are maintained in an Outlook Profile and only one Exchange mailbox can be included. If you wish to send emails from a different email address using Outlook, you must create additional “Send only” email accounts as explained below.
The basic principle is that our SMTP servers require authentication and, as long as you authenticate using a valid user account and password, you can create a POP3 “Send only” account within your Outlook Profile. You can use any valid email address (e.g. mailbox, alias or distribution list) that is created as an inbound email address on one of your domains that is hosted by us. Please contact us to ensure that these email addresses are set up with the correct permissions.
We will illustrate with an example in which you have an Exchange mailbox with an address of [email protected]. When you do this for yourself, you will use your own Exchange mailbox address and password wherever you see joe.user below. We will assume that you have already configured your email client (i.e. Outlook 2007) to connect to the joe.user mailbox using the correct process as explained in our other documentation.
This Exchange mailbox also receives email for [email protected], i.e. this address is an inbound alias address for [email protected], so mail for bob.user is also retrieved to your PC/MAC along with mail for joe.user.
You must configure your email client to receive mail for both addresses only once without removing any from the server and also to choose which address to use to reply or send new messages.
Start here by clicking Tools > Account Settings.
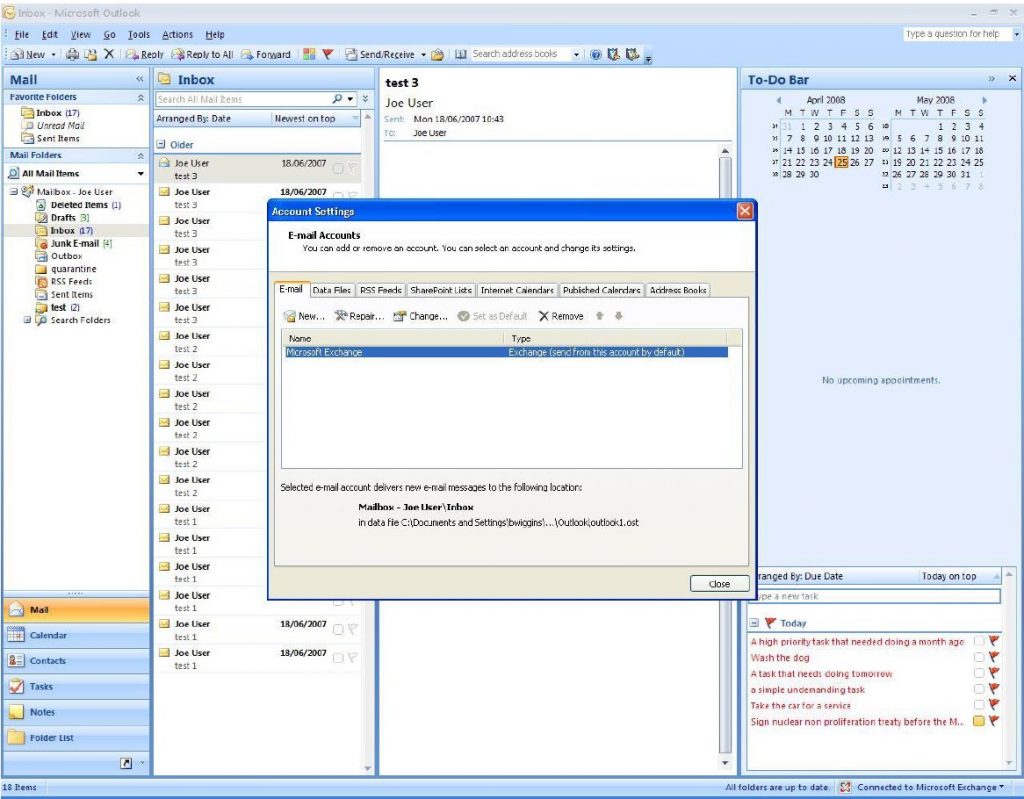
Click New.
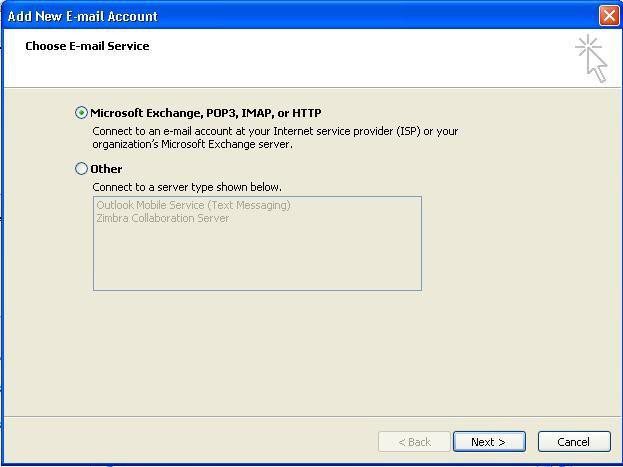
Ensure Microsoft Exchange, POP3, IMAP or HTTP is selected and Click Next >.
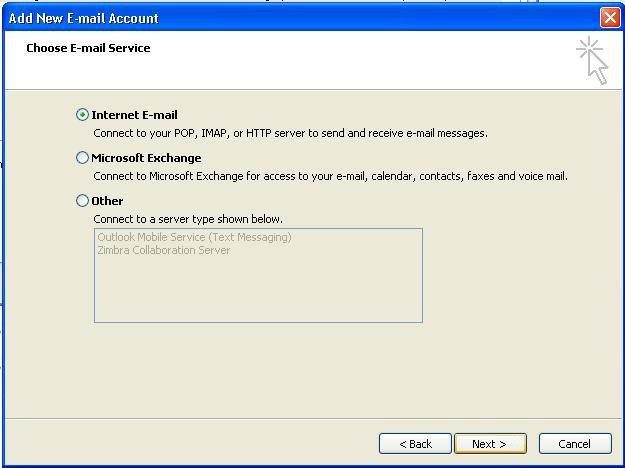
Ensure Internet E-mail is selected and Click Next >.
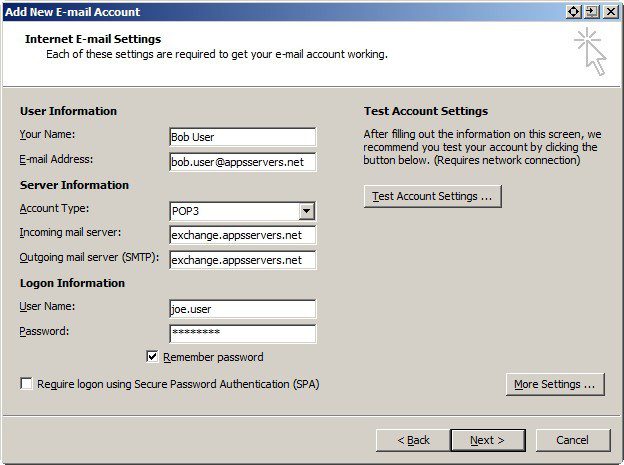
Enter Bob User as the name and [email protected] as the e-mail address.
Ensure Account type is set to POP3, add the correct server names for incoming and outgoing are both exchange.appsservers.net.
In Logon Information, enter your actual username, i.e. joe.user, as it is this account that you must use to authenticate the email. Enter the password for this mailbox and tick remember password.
Click More Settings …
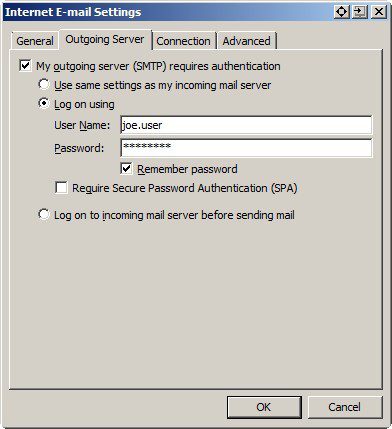
On the Outgoing Server tab select “My outgoing (SMTP) server requires authentication, select Log on using and again enter your username, joe.user, and the password.
On the Advanced tab select the following:
- Incoming server (POP3) port 995
- This server requires an encrypted connection (SSL)
- Outgoing server (SMTP) port 587
- Use the following type of encrypted connection: Auto
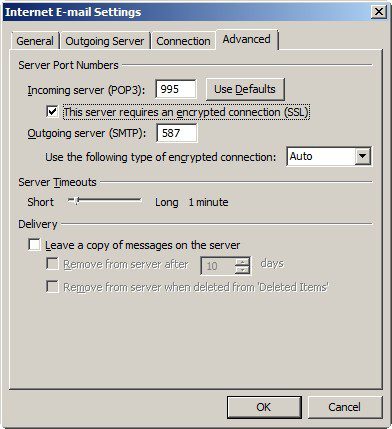
Click OK, Click Next >, Click Finish.
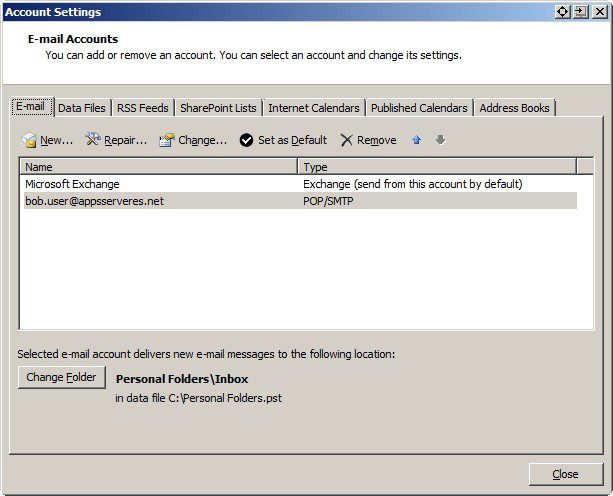
Half way there, click Close.
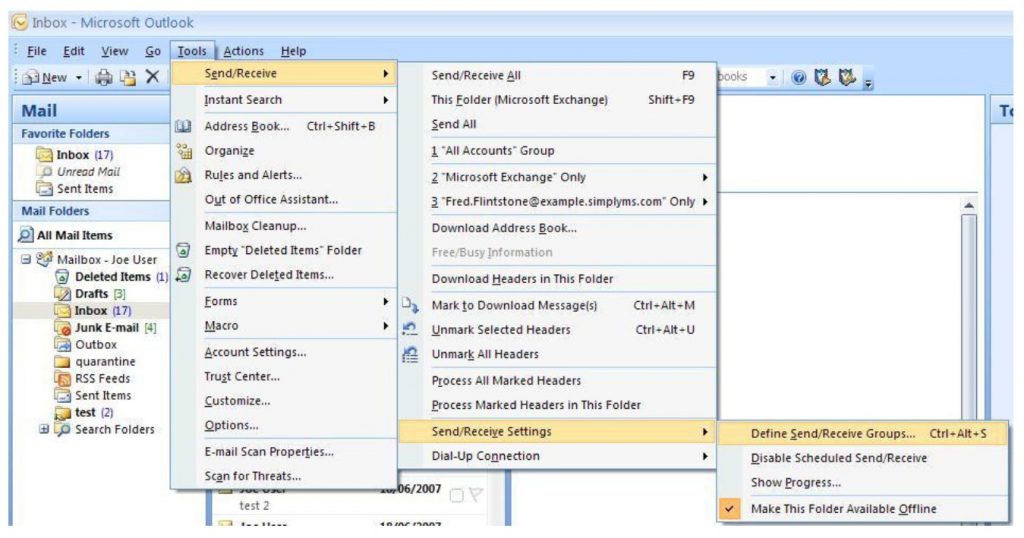
Click Tools > Send/Receive > Send/Receive Settings > Define Send/Receive Groups.
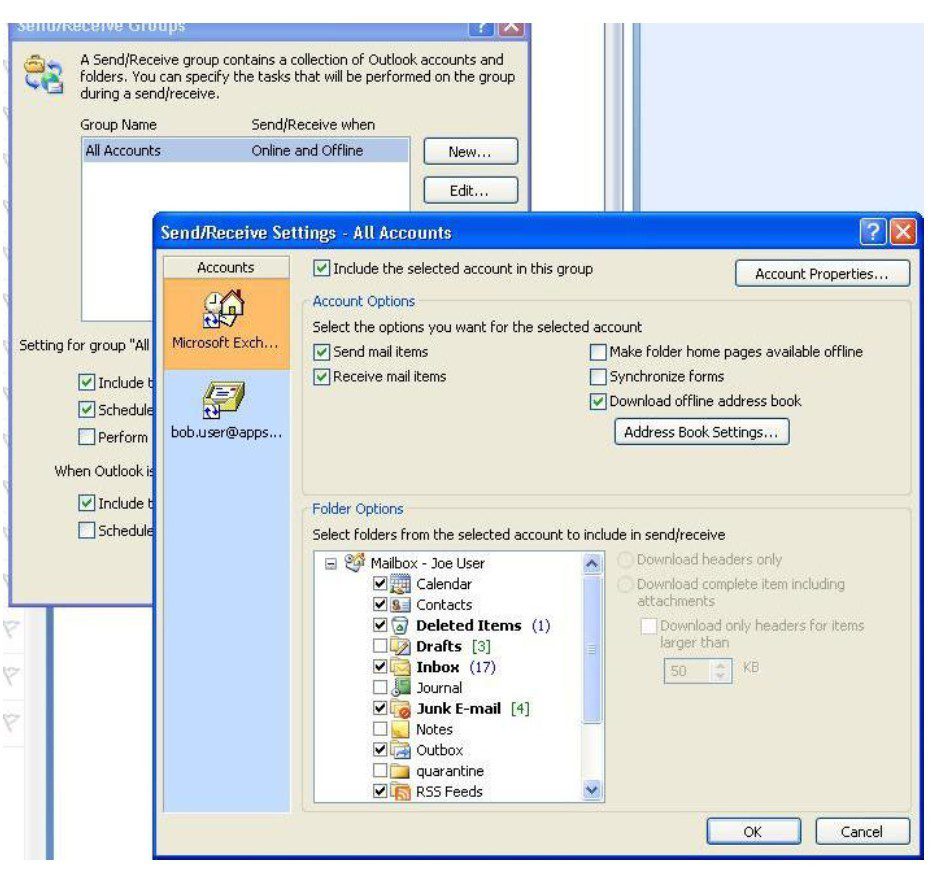
Select All Accounts, click Edit, then click bob.user at the left.
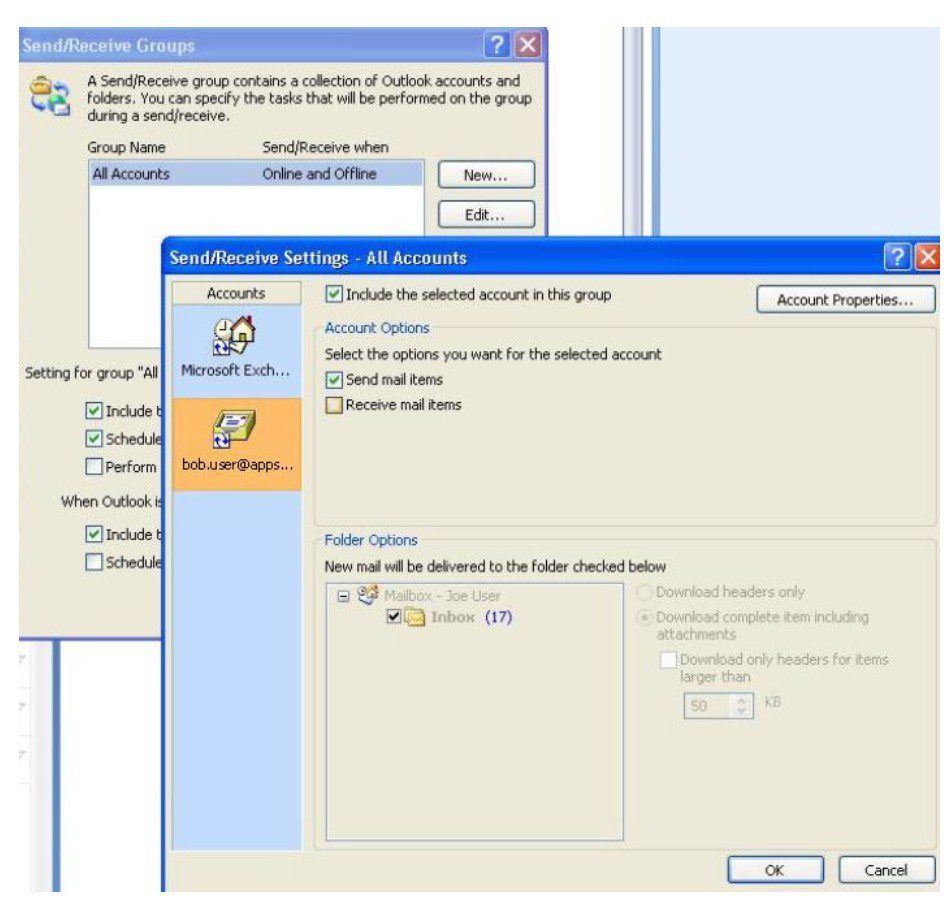
Remove the tick from the Receive mail items option, click OK, click Close. We remove the tick because bob.user is an alias for joe.user and so emails for bob.user will already be retrieved by joe.user.
Click Tools > Options > Mail Format > Signatures and create a signature for the bob.user account by clicking on New. You can also set one for your main Exchange mailbox user account.
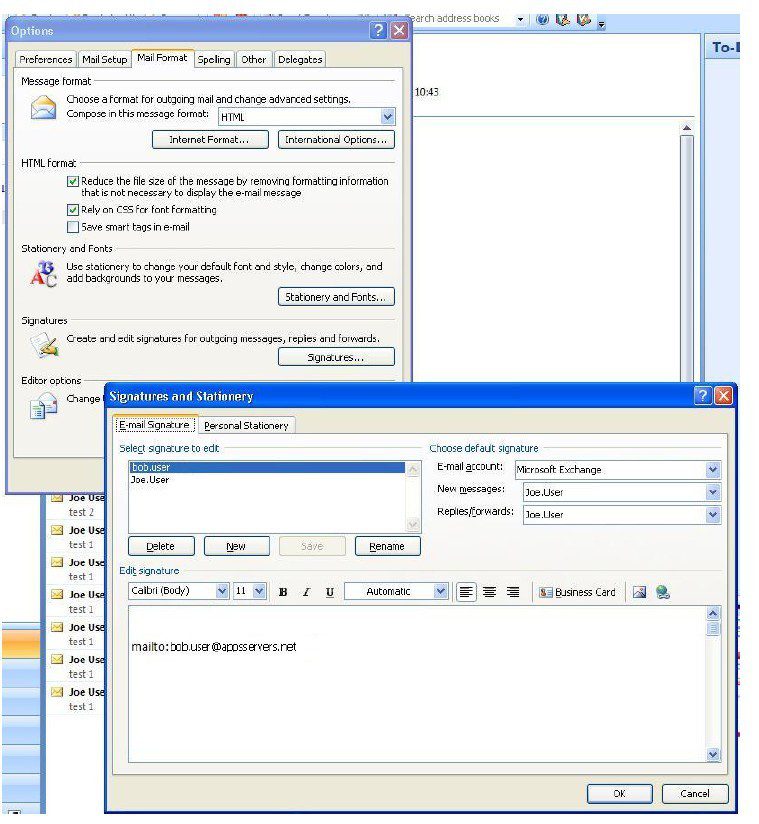
When you have created all the signatures you need, click OK a few times until you return to the main Outlook form.
On the home stretch now, only one more configuration step to go.
You may wish to segregate incoming mail for the second email address. To do this, you must create a subfolder under your main Mailbox.
Right click Mailbox – Joe User and select New folder, give it a name (e.g. Bob’s Mail), set it to contain Mail and Post items and place it in Mailbox – Joe User, click OK.
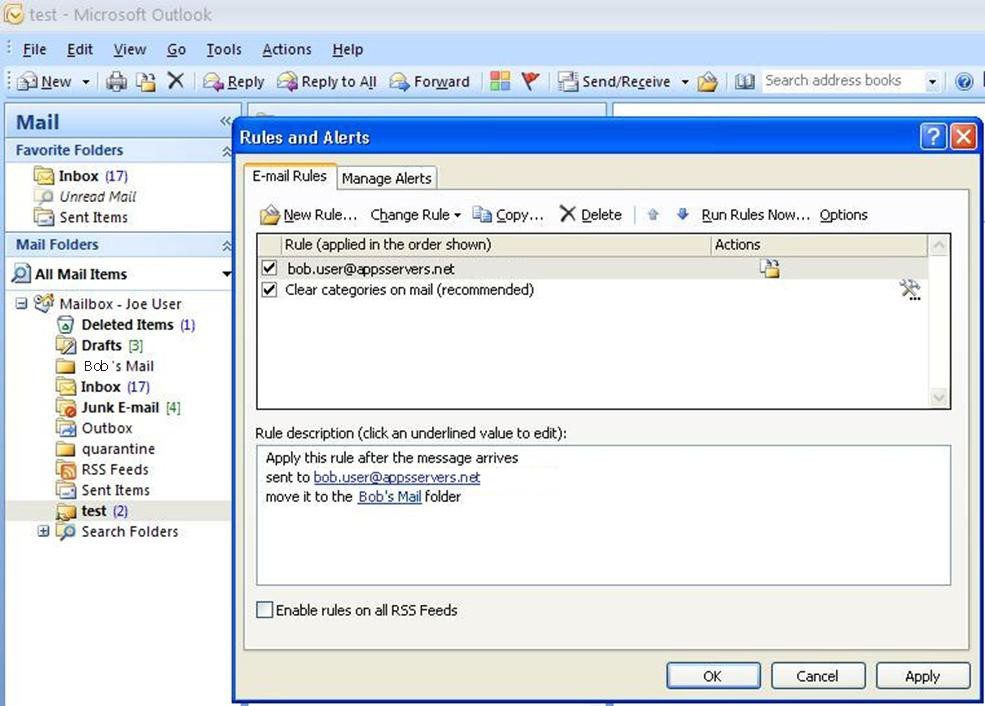
Click Tools > click Rules and Alerts then click on New Rule.
You must create a new rule that will automatically put mail received that is addressed to [email protected] into the new folder you have created.
When you save the rule it should look like the example below. Click OK to return to the main Outlook form
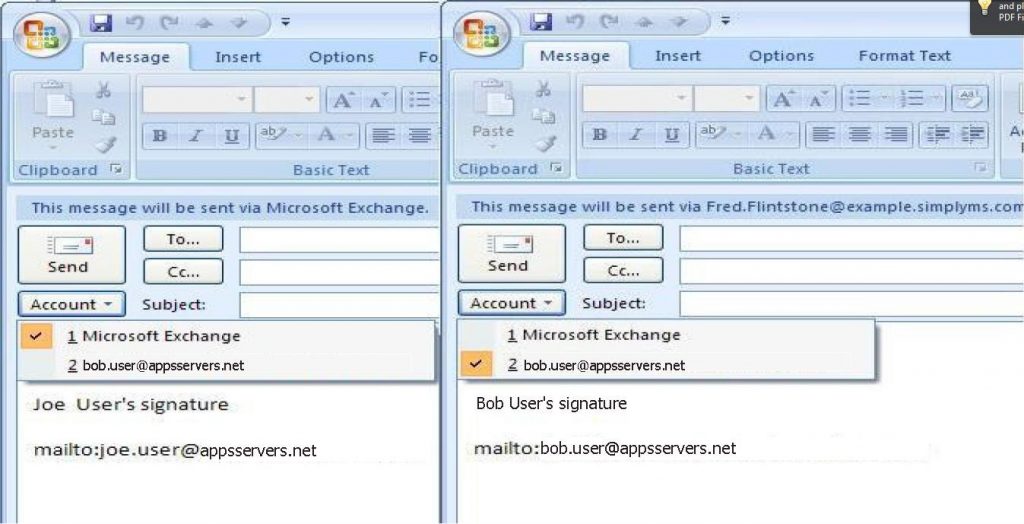
Now you are ready to compose a new email. In the compose email form, you will see a new “Account” button in the header.
Click this button to choose which account you use to send the email. The signature will change automatically.

0 Comments