Sales Daybook Import
Purpose:
To create templates (for future imports) and to import sales invoices and credit notes created in other systems or manually.
Preparation:
Create the necessary CSV file – see below for details.
Have details of file to hand in order to complete form.
Check and note sign convention – see form below.
If you want to show numbers instead of letters in your CSV file column header- In Excel go to File > Options > Formulas and check ‘R1C1 reference style‘ – remember to uncheck it when you have finished.
If you wish to use your own invoice numbers change the settings in Set Customer Preferences.
Processing:
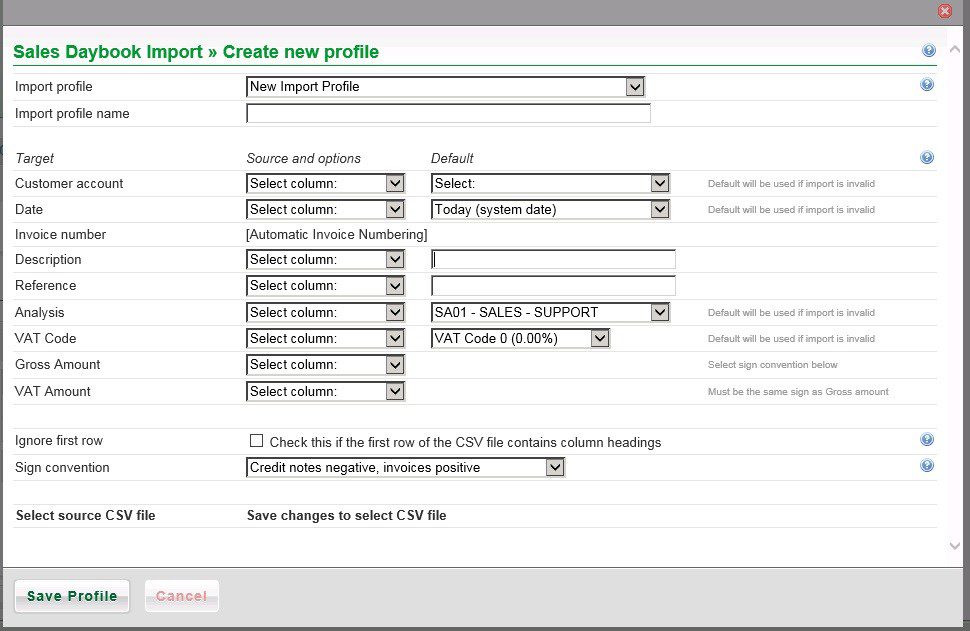
Click on Customers > Daybook Import to open this form.

- Import profile: Choose New Import Profile or select existing profile.
- Import profile name: If new, enter descriptive name – so its recognisable in future use.
- Select source fields from dropdowns and select defaults if appropriate. A clean error-free csv file is always preferable.
- If csv file contains headers tick Ignore first row.
- Note sign convention and select appropriate one.
- Click on Save Profile to create profile.
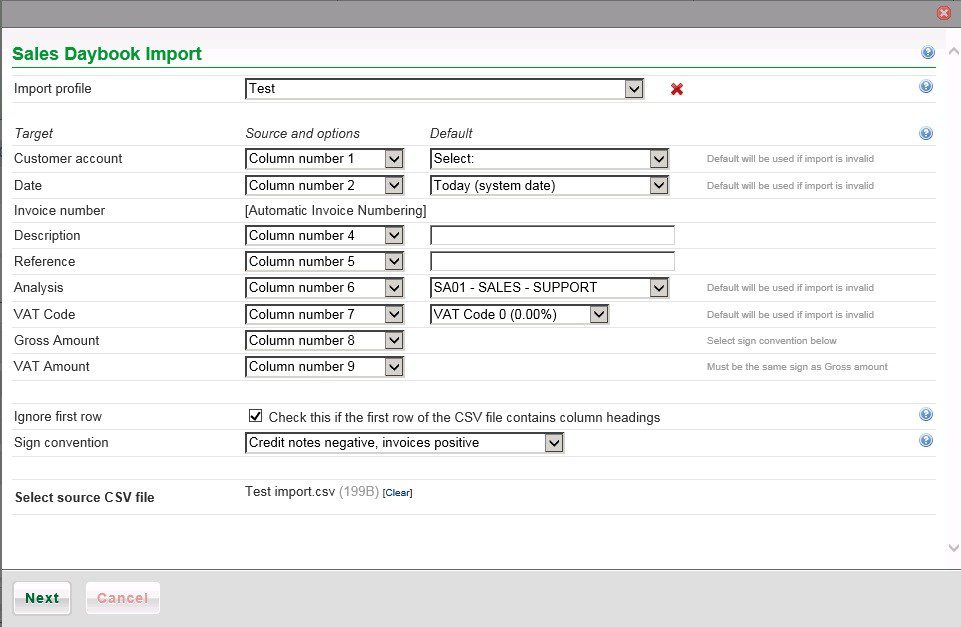
When complete the form looks like –

- Click on Next to select the source file (before this screenshot it has a search button to find csv file).
- Select the source csv file – as above and click on Next again.
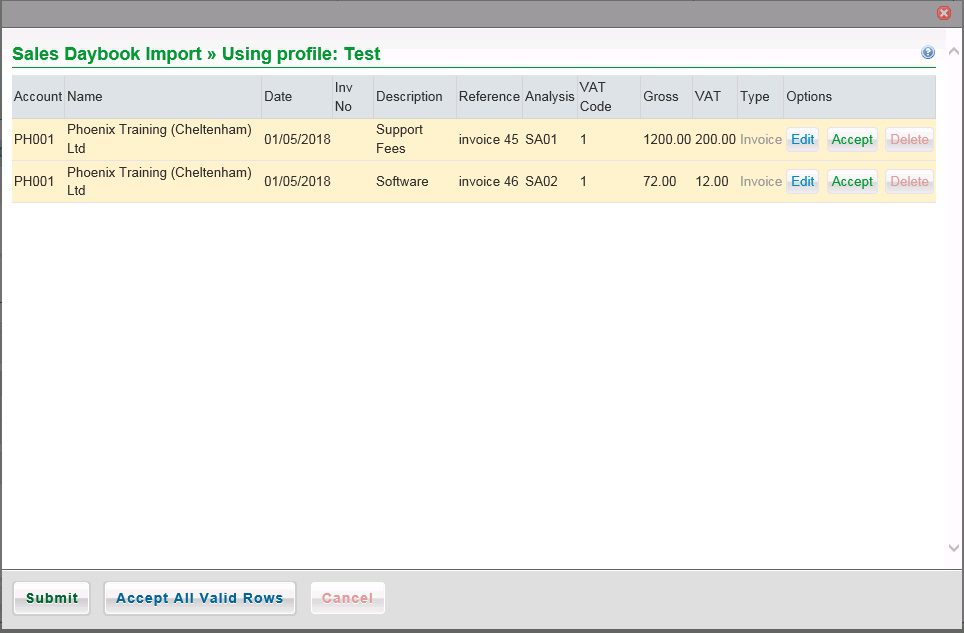
A preview appears –

You can edit or delete lines – or Accept all valid rows – the background changes from amber to green.
Here is an explanation of the colours –
Green – All original data passed validation, so the user does not have to Accept this data as it passed first time.
Amber – Some original data failed validation and has been changed by replacing with default settings as defined in the profile, so the user must either Accept these automated changes or Edit the data.
Red – Some original data failed validation and either there is no default setting available, the default setting is not defined in the profile, or it can’t be replaced with the default setting, so the user must Edit the data.
Make the necessary corrections until all are green, then click on Submit.
A Data Has Been Imported form appears – click on Close.
Here are the postings for the above –

CSV format

Resume from aborted imports
If, for any reason, the import fails you will be able to go in, select the profile, and pick up where you left off. You will be asked to Resume or Delete (if you no longer want the import)
A selection form will allow you to select a profile – if there is only one you will receive a message ” If this import is in progress in another browser, you should cancel and continue from there, not here.” Likewise if you have more than one you will receive this message “If these imports are in progress in another browser, you should cancel and continue from there, not here.” If there is more than one select the one you want by clicking on the appropriate radio button.
There is also a facility to allow you to delete the temporary files you no longer need.

0 Comments