POP – Enter Purchase Orders
Preparation:
The following list of possible preparation steps will help you decide if you need to do anything before processing and if you need help.
- Select a company – see Change Companies.
- Obtain an up-to-date supplier list – see List Suppliers.
- Obtain an up-to-date nominal code list – see List Chart of Accounts.
- Ensure supplier account details are up to date – see Create & Edit Supplier Accounts.
- For first time use only: Ensure stock files have been correctly and completely populated with products & services – see Input Your Opening Data.
- Change the system date as required – see Change Default Accounting Date.
- For first time use only: On the main menu Click View > Parameters > Purchase Order Processing – see Purchase Order Processing Parameters – General Page. Set parameters as required.
- For first time use only: Design Purchase Order – see Stationery Design
- For first time use only: On the main menu click View > Parameters > Purchase Order Processing > Printing & Entry Options – Link Ref to Purchase Account Field – Click Yes if goods are to be delivered directly from suppliers to a customer’s premises.
- When creating an order, enter the supplier’s account number into the first reference field. This will populate the Delivery Address Field with the Supplier’s address. If using this, obtain an up-to-date supplier List – see List Suppliers.

Processing:
On the main menu click Orders > Suppliers > Enter Orders to open form.
Select printer – see Printing Reports.
Click OK to confirm selection and open form.
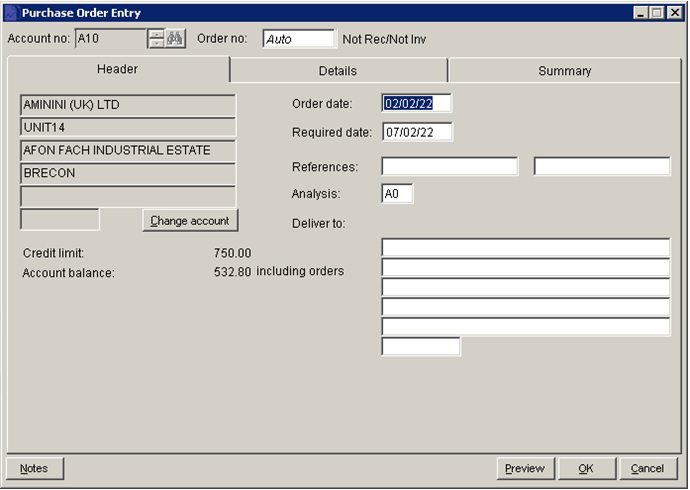
Complete form details– see Purchase Order Entry form – below.
Click OK to update records and print order.
Filing:
Any source documents retained to be cross–referenced to order and dated.
- Required: Defaults to parameter setting – see Purchase Order Processing Parameters – General Page. Overwrite if supplier delivery date is different to that shown. The order will be reported as being due for delivery on the date shown.
- References: 2 Fields – Type in a maximum of 16 characters in each field. If Link to sales account is checked in POP parameters entering the customer account code in the first reference will populate the address field for delivery direct to that customer.
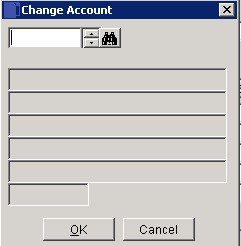
Change Account:

Select and click OK to update.
Analysis: Maximum 2 characters account specific – suppliers can be grouped together for reporting. Defaults to code shown on ledger account – see Purchases Analysis.

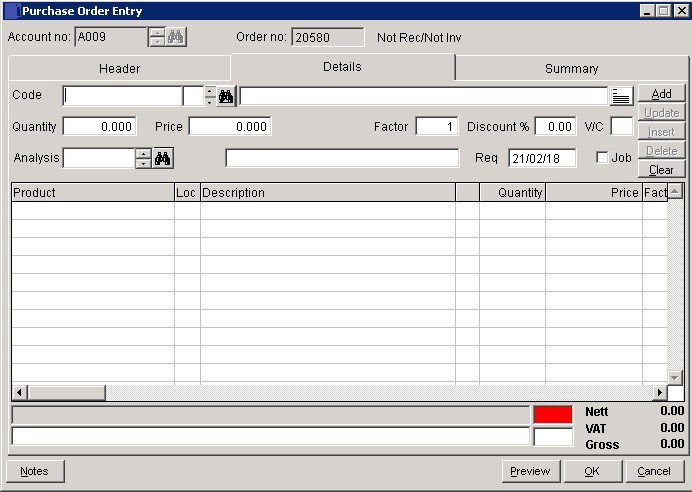
- Select or search for Product and Description displays – overwrite if required.
- Add Quantity, amend Price if necessary, amend VAT Code if necessary.
- Enter or select other detail, then click Add to place on grid.
- Line notes: Press …. to display the line notes form. Enter notes that are specific to this line item in this transaction.
- Button turns red when a line item contains notes. Can be edited the same way as other grid items.
- Can be printed on stationery – see Include line notes in stationery design.
- Analysis: Select required nominal code.
- Note Stock availability.
- Update: Select line on grid to amend click on Update to take to top – amend details and click on Update again to take back to grid.
- Insert: After filling in details highlight line below where you want to insert and click on Insert.
- Delete: Highlight line to delete and click Delete.

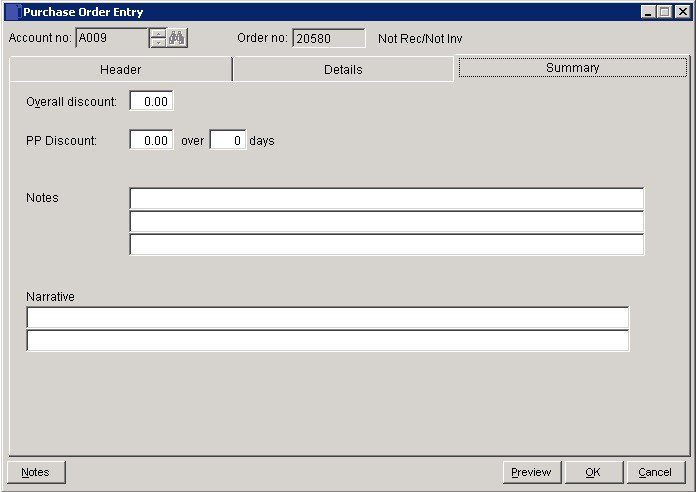
- Overall Discount: Discount applying to Total Invoice value.
- PP Discount: Prompt payment discount available for settlement within number of days from invoice date.
- Notes & Narrative: Text which can be displayed on Purchase Order as required by including these fields on your stationery design – see Stationery Design.
- OK: Generate and print Purchase Order.
- If Use document reprints field is checked on parameters click Yes to reprint.
Search for existing details
Please refer to https://help.prelude.software/knowledge-base/cash-book-post-sales-ledger-receipts/ – bottom of page for details of search facility

0 Comments