Skip to content Skip to main navigation Skip to footer

Customer Maintenance – Add New, Edit And View

Customer – Add new

Processing:
Click on Customers >New to open up this form:
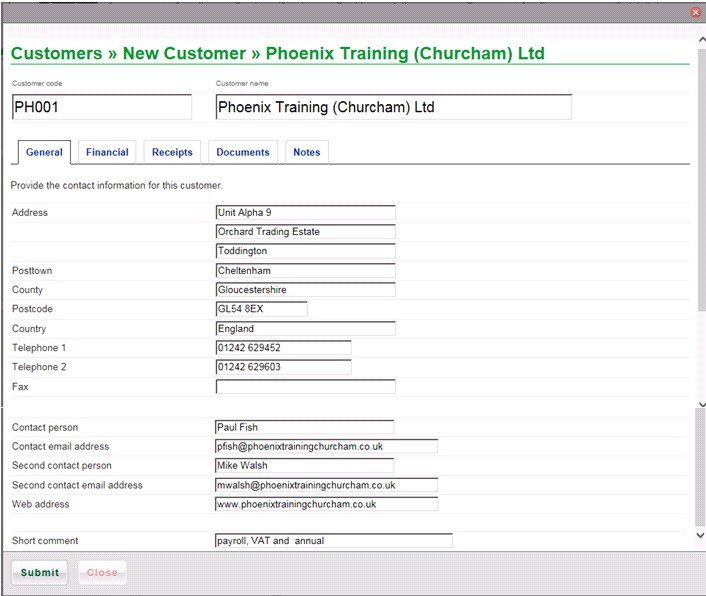
The cursor will appear in the customer code box. Before entering for the first time carefully consider what coding structure you will use.
I have used two alpha and three numeric – this will give me all my customers in ‘more or less‘ alphabetical order. There are 8 alphanumeric characters available- the more alpha you use the greater the alphabetical accuracy for searching – much depends on the number of customers you have.

Complete the rest of the information – it is straightforward, then click on the Financial tab.
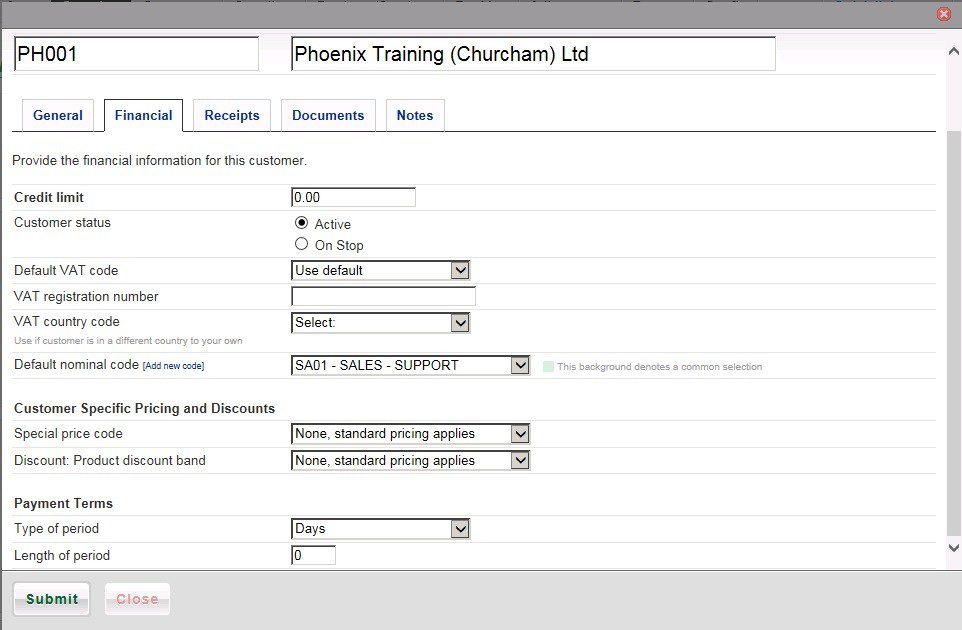
  • Enter Credit Limit after making the necessary credit checks.
  • The default customer status is active. If you have a dispute with your customer click on the ‘On Stop‘ radio button – this will hold the despatch of future goods or raising of invoices until the dispute is settled and you have clicked back on the ‘Active‘ button.
  • Enter the Default VAT code for this customer – depending on what you sell the most of to him – if you have more than one type of VAT supply.
  • Enter the Customer’s VAT number – if you need to – usually if an EC customer or if you deal in self billing – If an EC customer remember to put the country code in front of the VAT number.
  • Then select the Country Code.
  • Select the Default Nominal Code – this depends on the detail of analysis you require in terms of product sales and what this customer may buy from you – see Products/Services – if you are selling a specific range of products or services that are sold regularly please consider and use the Products/Services functionality – even if it’s just regular descriptions of products or services. Ideally set these up first before using invoicing. Then consider the product/services analysis of sales you want in the nominal ledger – you may need to create additional nominal accounts first – see New Product.
  • Select Payment Terms – type of period and enter the number of days applicable.

Click on the Receipts tab
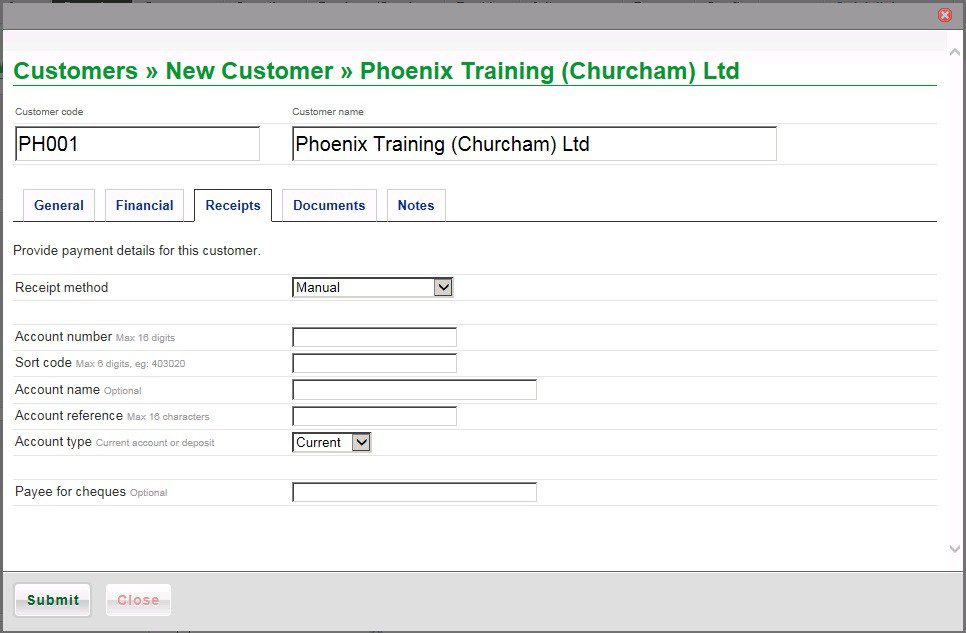
Select Receipt method from Manual (cash or cheques) or Electronic/BACs (includes Direct Debits and Standing Orders).

Enter customer’s bank details – used for making refunds – if necessary.

Click on the Documents tab.
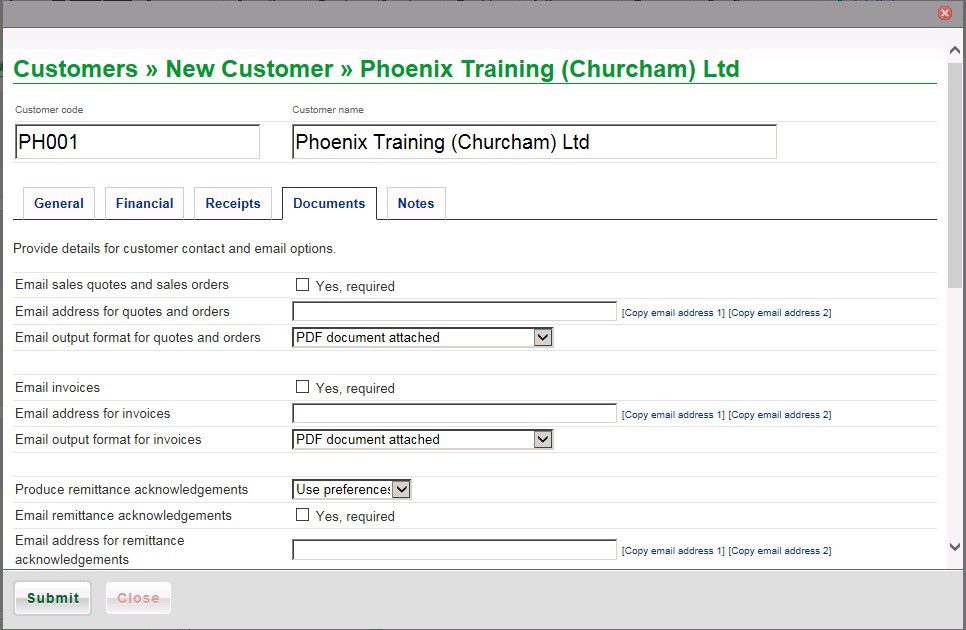
Complete as necessary. You can copy email addresses from the General page – Copy email address 1 and 2 or enter a different one – remember to tick the Yes, required boxes.

Use preferences – see

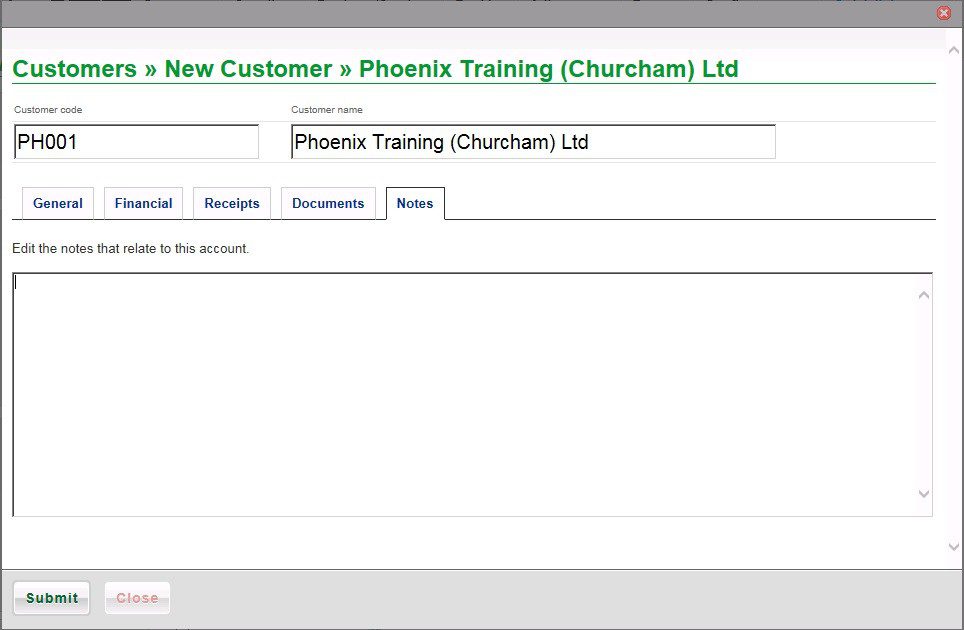
Enter any relevant notes – include date and initials.

When happy with details enter click on Submit or Close without saving.

Customer – Edit

Processing:
Click on Customers >Edit.

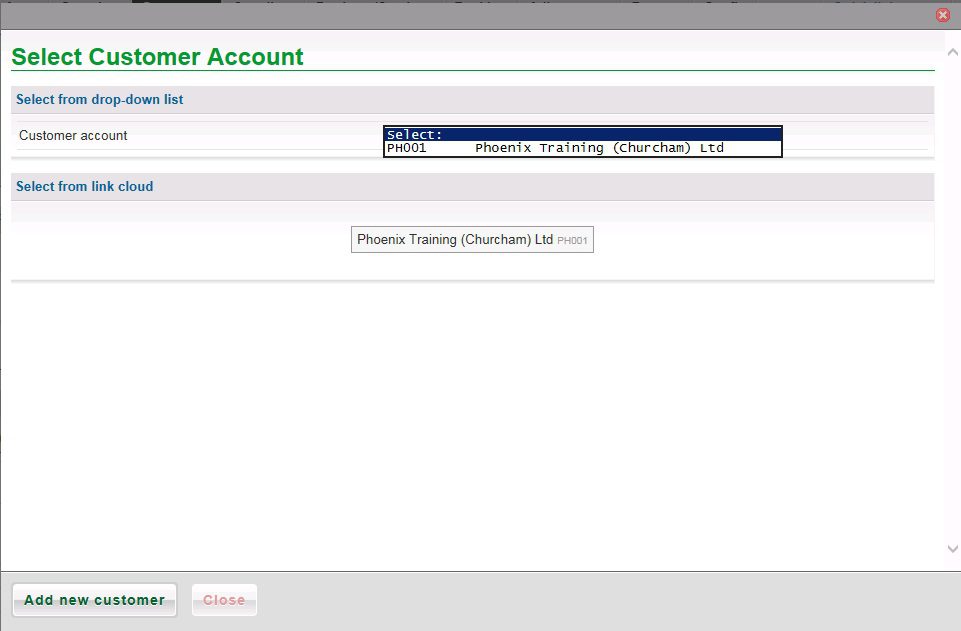
The select customer form appears.

Select customer from drop down List or from cloud link list.
The customer record opens.
Make the necessary amendments – see Customers – New above.
Click Submit – the record is updated and Overview page appears.
Note: You can also add new customers by clicking on Add new customer.

Customer – View

Processing:
Click on Customers > View.

The Select customer form appears – See Customers – Edit.
Select customer from drop down list or from cloud link list.
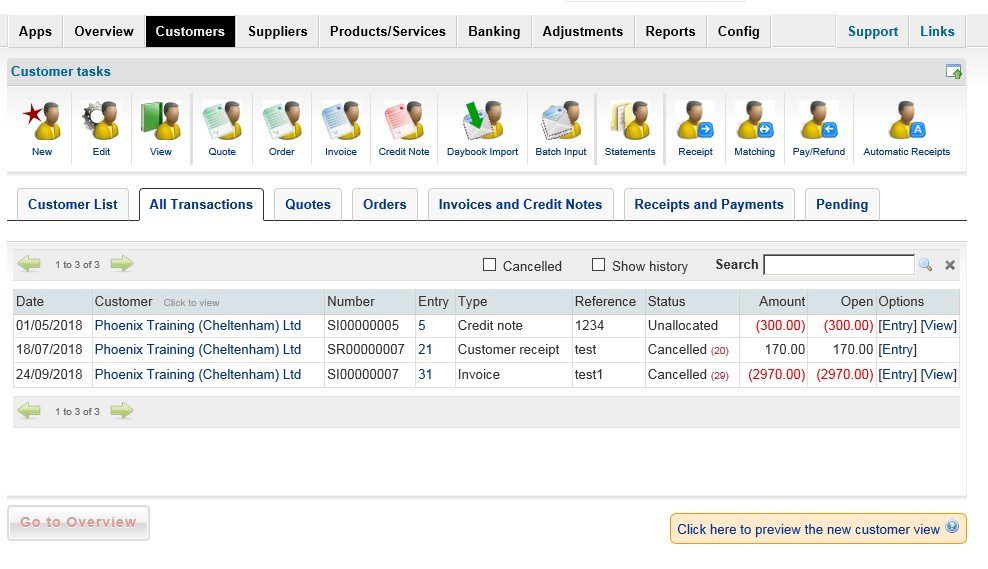
the Customer – View page appears –

The ‘All Transactions‘ tab shows the outstanding transactions – check the boxes in the title bar to see Cancelled and matched transactions (show history). Transactions are Invoices and Credit Notes and Receipts and Payments – also detailed on their own tabs. Likewise Quotes and Orders outstanding are shown on their tabs.
The ‘Summary‘ tab gives you the company and contacts details and some financial figures – click on [Edit] to update the company or contact details.
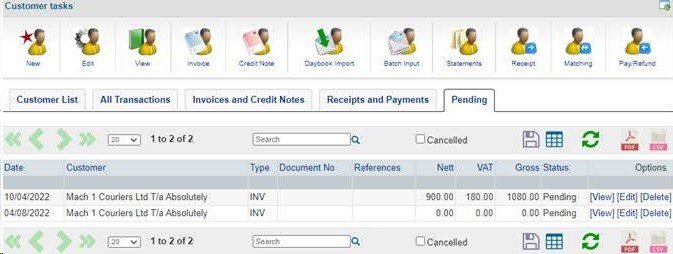
Pending shows incomplete invoices, quotes and orders not yet updated to the next stage.
Click on Notes to view notes.

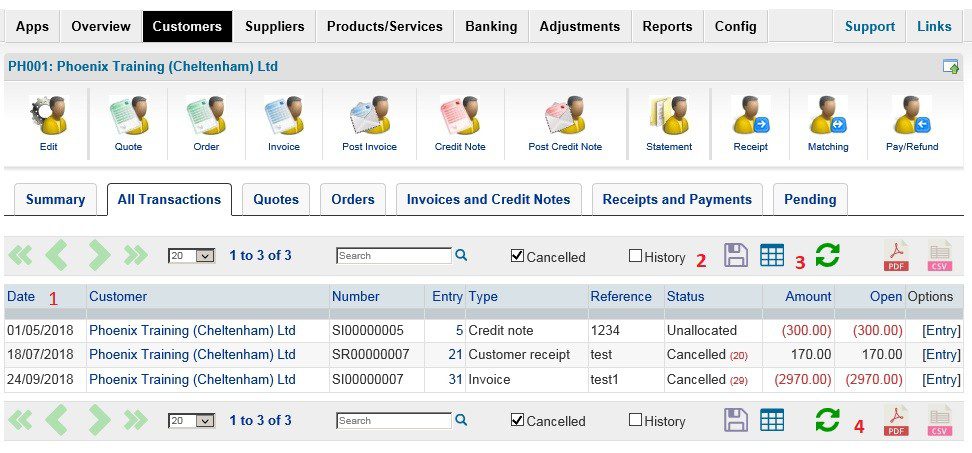
Clicking on Click here to preview the new customer view changes the title bar to provide more functionality –

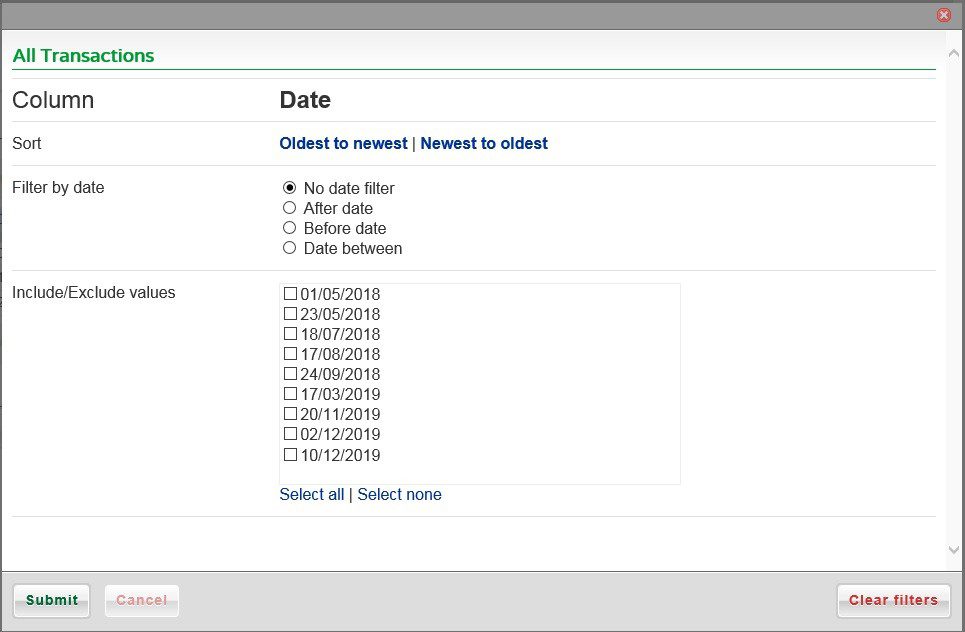
1 The blue titles are filter hyperlinks – clicking on Date opens up this form –

The options are self-explanatory.

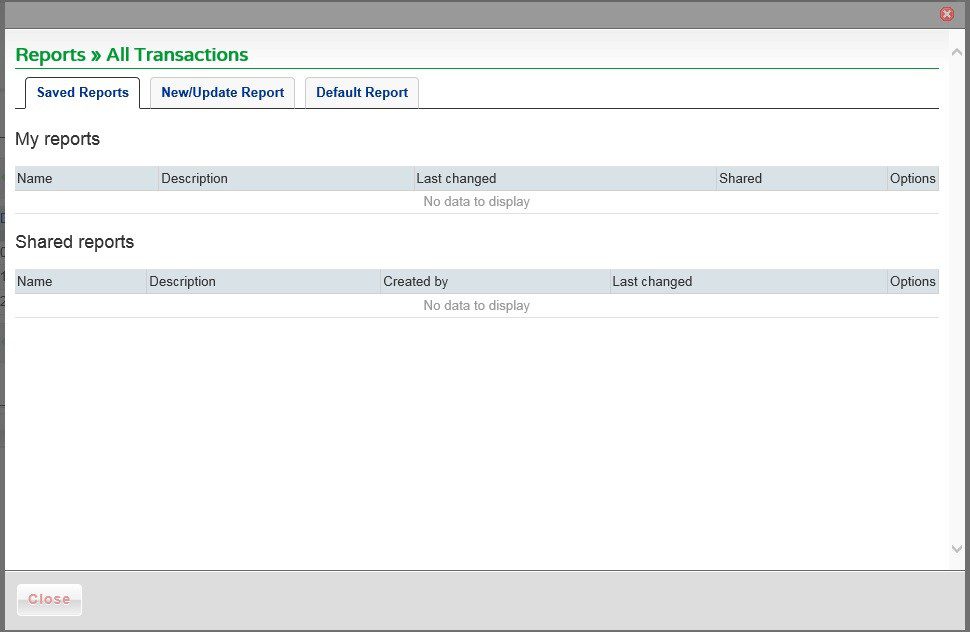
2 – The floppy disk image opens up ‘Saved Reports’ – See table image below

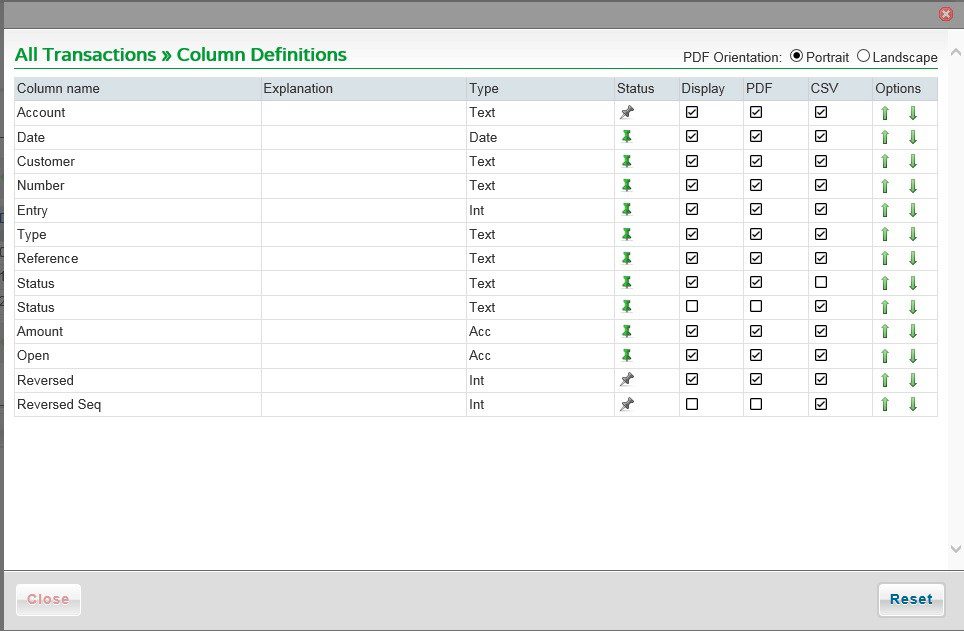
3 The table image opens up this form –

  • For each of the columns you can use the status pin to make active/inactive.
  • Check or uncheck to include in or exclude from the Display.
  • Likewise – Check or uncheck to include or exclude columns from PDF or CSV reports and save them to appear in the form above.

4 The pdf and CSV buttons are moved.

Pending Tab

Used to ‘park’ items for later completion or to hold sales and purchase orders for completion.

The system is aware of these items and should you try to delete a record with items pending relating to it you will receive a wrning message –

You can delete the records in some circumstances, if there are no other transactions.

0 Comments

There are no comments yet

Leave a comment

Your email address will not be published. Required fields are marked *