How Do I Add Cumulative/ Running Totals To Statements.
Please go to https://help.prelude.software/knowledge-base/sales-ledger-print-customer-statements/ and read the paragraph at the bottom of the page. This can also be used for Remittance Advices.
Please go to https://help.prelude.software/knowledge-base/sales-ledger-print-customer-statements/ and read the paragraph at the bottom of the page. This can also be used for Remittance Advices.
Step 1
Amend the invoice stationery design
Extend the Net, VAT and Total fields block downwards and add AMT_PD and BALANCE_AMT from the data envirionment – Do this for all the invoice options you use.

Step 2
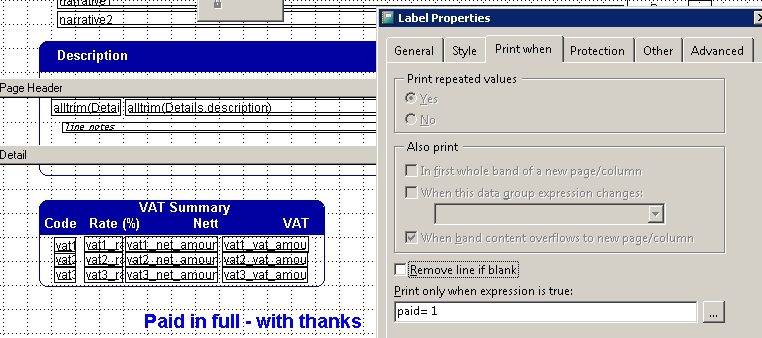
Add conditional comment to the stationery design
Use the text field and format the phrase you want. For it to appear only when it has ben paid enter PAID=1 in the ‘Print When’ properties tab.
Step 3
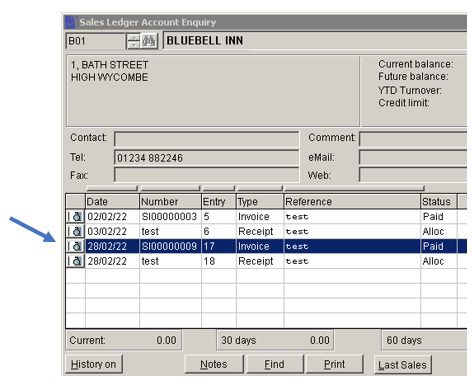
After the invoice has been paid and allocated – use ‘Reprint’ –
Step 4
Print or email the invoice and send to customer –

Purpose: To send send copy invoices marked as such so that duplications don’t occur.
Process:
Go to ‘Edit a produced invoice‘, the select the customer and the relevant invoice.
Go to the Summary tab and enter ‘Copy invoice’ or appropriate wording as boldly as you wish into the narrative field.
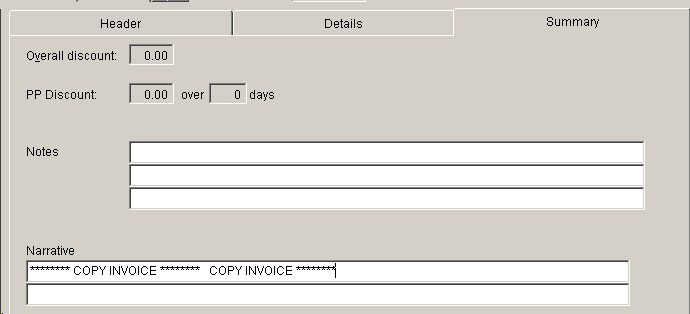
This will not affect any postings. However you may need to add the Narrative fields to the invoice stationery design – see https://help.prelude.software/knowledge-base/file-menu-stationery-design-data-environment/
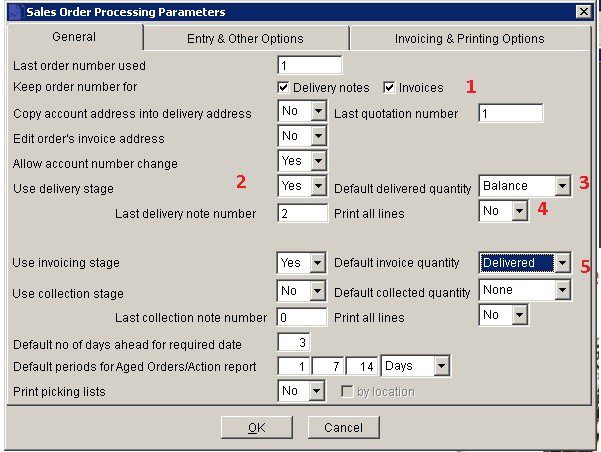
Change Sales Order Processing Parameters to –
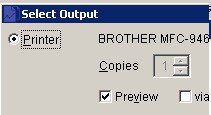
Enter a sales order at beginning of month/week as normal for the first delivery. Ensure print is set to Preview –

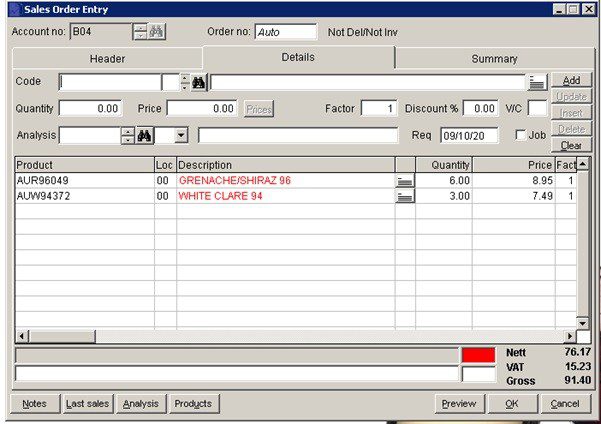
After entering details – like so
and pressing OK you will get Order Acknowledgement –
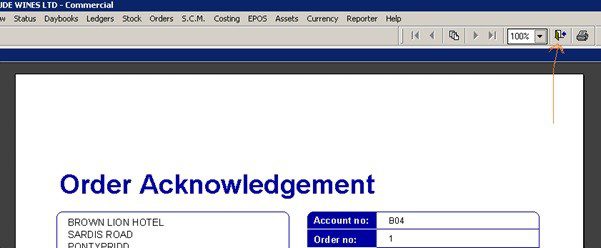
Close door to not print.
Print Delivery Note (Deliver Goods)
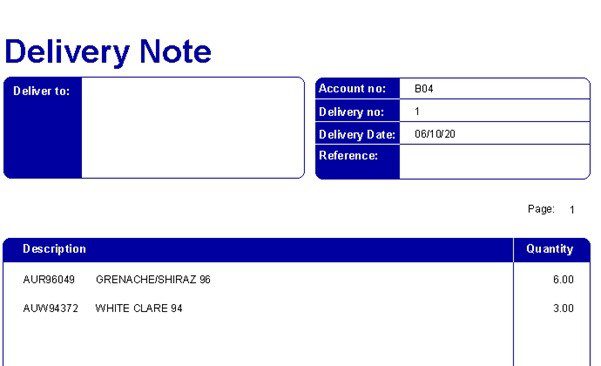
DO NOT print invoice.
Next Delivery – Open existing order – Amend Order and add items – Preview on – don’t print Order Acknowledgement – as above. See below two items added.
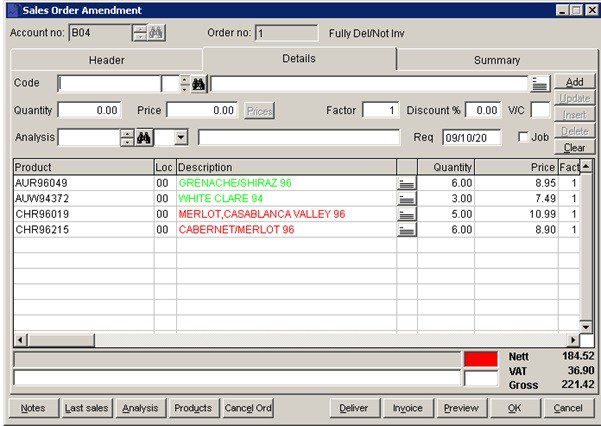
Print delivery note – see it’s for the last items delivered only.
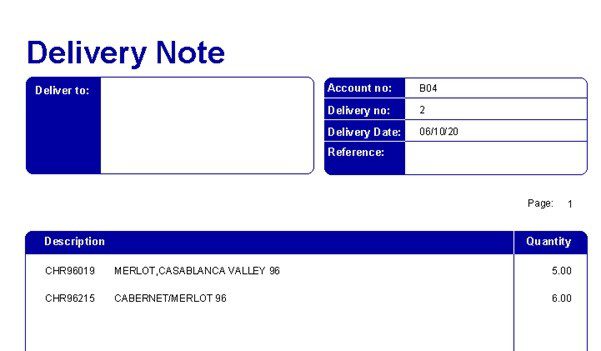
Continue like this until end of month/week and after last delivery print the invoice.
Usually to create a new customer account or edit an existing customer’s account details, click menu Ledgers > Sales > Account Maintenance.
Alternatively, click the Sales Ledger Account Maintenance button on the toolbar.
It is a good idea to have a fixed structure for your customer codes to help you identify and group them.
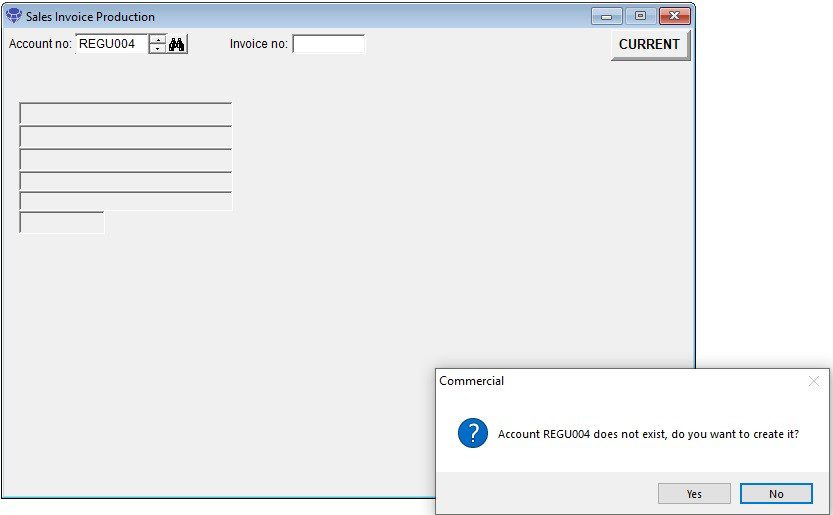
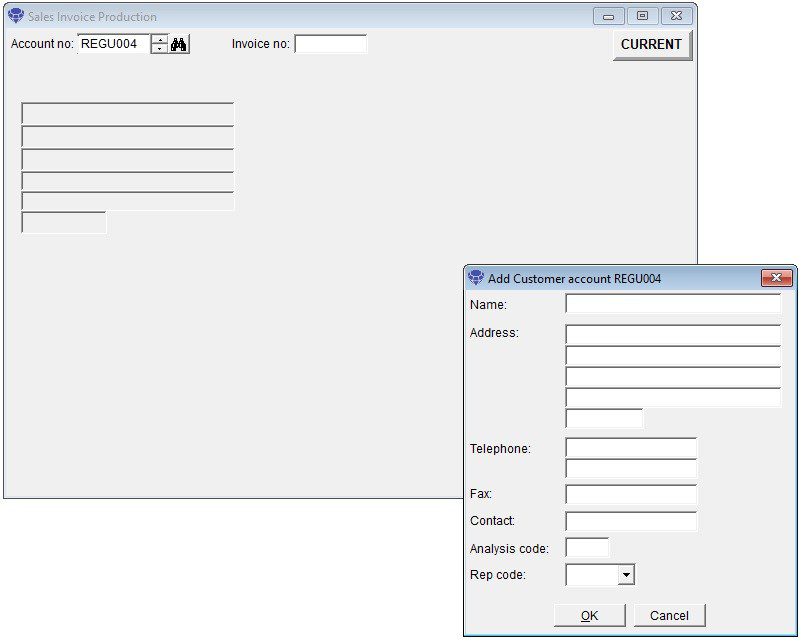
Sometimes you may be in the process of posting invoices and do not have an existing customer – you can continue to process the invoice – just identify from the drop down list the next account number you can use, enter it and you will be asked if you wish to create a brief version of the account – enough to continue with the invoice. Make a note of the account number and later go to the account in Ledgers > Sales > Account Maintenance. and complete the rest of the details. See the following images.
To create a Customer invoice, click menu Daybooks > Sales Daybook > Produce Invoices.
Alternatively, click the Produce Sales Invoices button on the toolbar.
The Select Output Form is displayed, followed by the Sales Invoice Production Form after you have selected your output option – e.g. printer or PDF document.
Select the customer you want to invoice and enter references on the header page. Click on the details page.
Ignore the stock selection binoculars (Code) and enter the invoice details into the description line. Click on the line notes button to add further details.
Once you’ve entered all the invoice details, click on Add to add to the grid. you can add further lines or continue to the summary page or click on OK to save. The invoice can be amended later, if necessary.
The invoice will be produced to your selected output and will appear in the customer’s account listing (accessible by clicking menu Ledgers > Sales > Account Enquiry) – see Sales Ledger Account Enquiry Form.
You can re-print the invoice from this form.
See more details in Produce Sales Invoices in the Sales Daybook section.
You may have an overseas customer who wishes to be invoiced and pay in Euros and you only have a Sterling account.
When the customer pays you will get an advice from your bank, showing the Euro value, the Sterling equivalent and the bank charges.
When you process the bank reconciliation you will see three entries in the cash book relating to that one transaction.
Note: A cash sale doesn’t produce an invoice document and records a payment at the time you make the sale.
If you want to produce an invoice document or you allow a customer to delay payment, you should Create an Invoice.
To record a cash sale, click menu Daybooks > Cash Book > Receipts > Cash Sales.
Alternatively, click the Post Cash Sales button on the toolbar – see Configure Toolbar.
The Cash Receipt Entry Form is displayed.
Enter the cash sale details which will be debited automatically to the Cash Sales Control Account.
Once you’ve entered all the cash sale details, click OK to record it.
See more details in Process Cash Receipts in the Cash Book section.
Note: Prelude Cloud has its own cash sales section – see Cash Sales.
If a customer returns faulty goods or you wish to credit their account for any other reason, you need to create a credit note.
To create a credit note, click menu Daybooks > Sales Daybook > Produce Credit Notes.
Alternatively, click the Produce Sales Credit Notes button on the toolbar – see Configure Toolbar.
The goods returned may not be faulty – e.g wrong size or wrong colour or wrong part delivered and after inspection you may wish to put them back into stock – Go to Menu > Stock > Movements > Returns to book them back into stock. You have the option to return to stock when creating the credit note providing you have checked the ‘Credit Notes to Update Stock‘ in the stock parameters – either Yes or Ask .
If you wish to keep track of all returns consider creating a separate nominal account and stock category to record the returns in the financial year – the stock value will be shown against that category in the report but is ignored in the stock valuation. Any balances at the year end must be reduced to zero.
If the goods have been damaged in transit and have been returned promptly enough you may wish to claim against the carrier.
Note: Before issuing a refund, you should first create a credit note for the customer.
To pay a customer refund, click menu Daybooks > Cash Book > Payments > Sales Ledger.
The Post Sales Ledger Payment Form is displayed.
Type the code for the customer being refunded.
Once you’ve entered all the details, click OK to record the refund.
See more details in Process Customer Refunds in the Cash Book section.