How Do I Set Up Additional Email Accounts?
In Outlook click on File then Account Settings.
Click on the Data Files tab first.
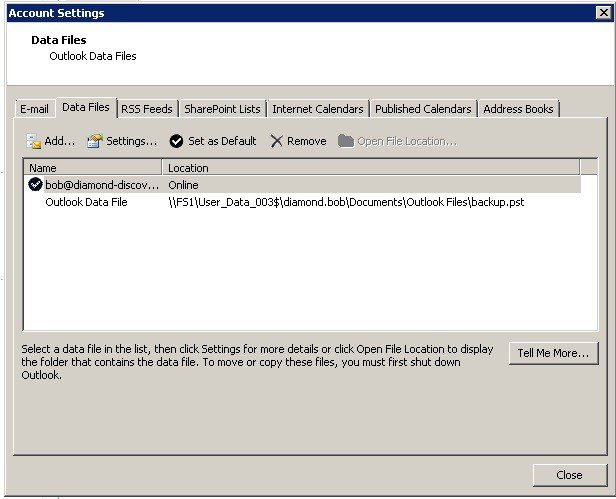
If there is an Outlook data file listed then fine, else click on Add to create one. This file is a requirement from Outlook 2010 onwards.
Click on the E-mail tab
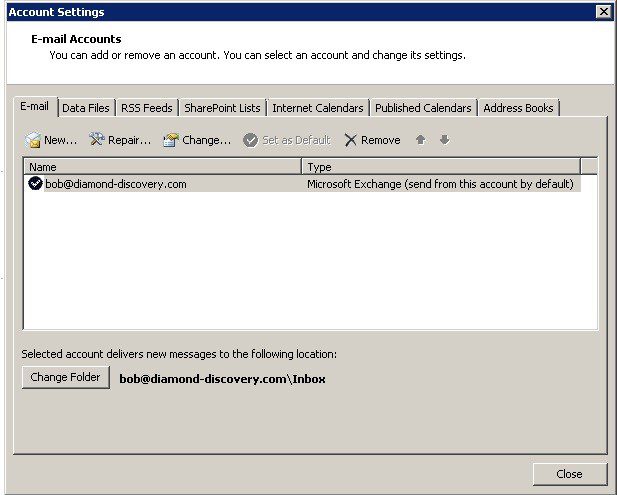
Click on New
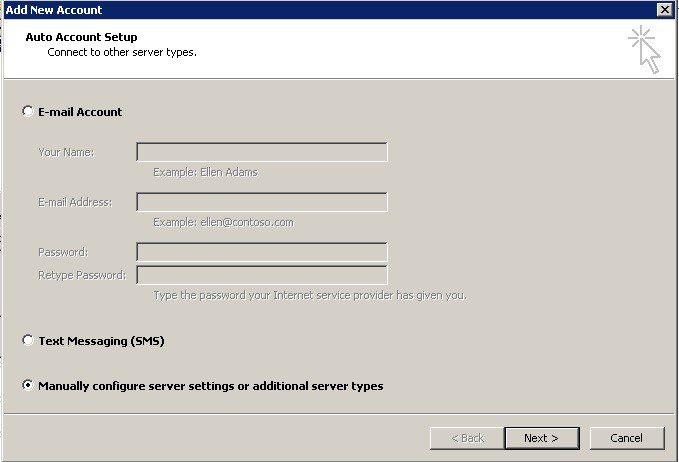
Then select Manually configure (as above) then click Next>
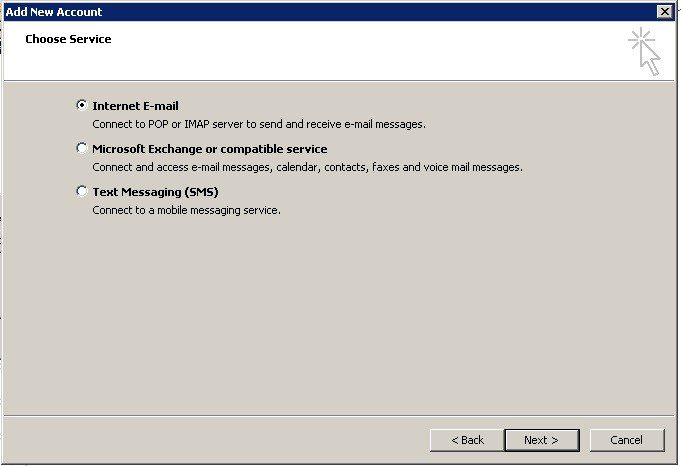
The default should be as above – if not select the Internet E-mail option then click on Next>
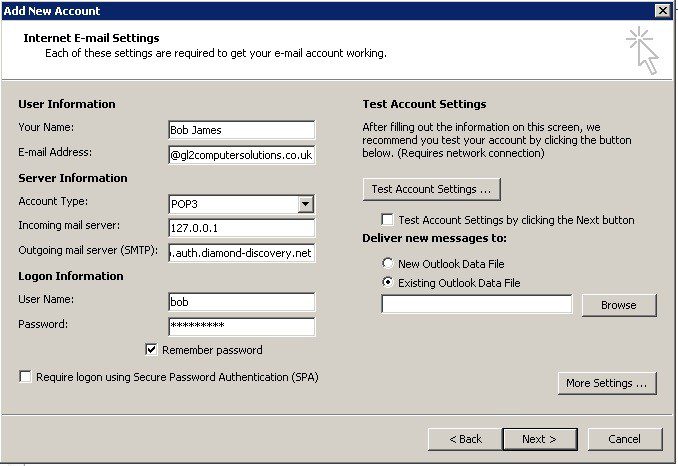
Enter Your Name, E-mail Address, Account type is POP3, enter Incoming mail server and Outgoing mail server details – you may need to find out what these are from your network administrator.
Prelude has processes in place where the Web Server authenicates the email address.
The logon information is not really important as these relate to the incoming server and you are only wishing to add accounts to send emails – so anything can be entered.
Untick the Test Account Settings box as it’s not needed then click on Browse to locate the outlook data file.
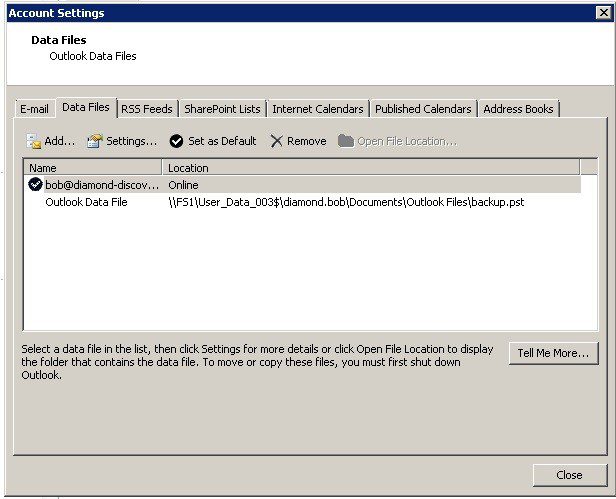
The file name will then be included in the box. Now click on More Settings.
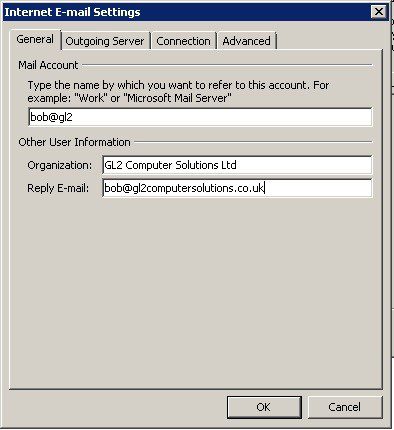
Add a short title to Mail Account box, enter organisation name then enter Reply E-mail address – this MUST be the same as the email address entered in Add new account – above – spam test.
Click on the Outgoing Server tab.
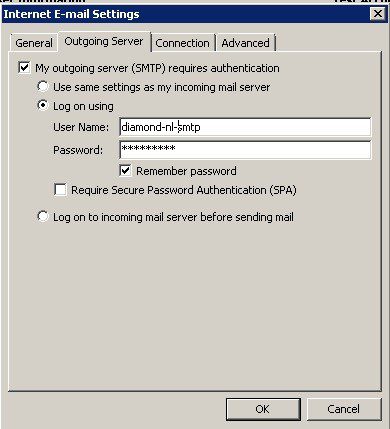
Tick the My outgoing server (SMTP) requires authentication checkbox.
Select the Log on using radio button and enter User Name and Password – tick Remember password checkbox.
Click on the Advanced tab.
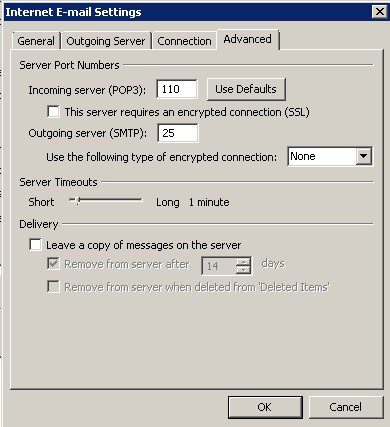
The server port numbers should be ok as they are.
Untick the Leave a copy of messages on the server checkbox then click on OK.
The account is now set up.
Going back to the Accounts Settings form you can change the folder to which messages go.
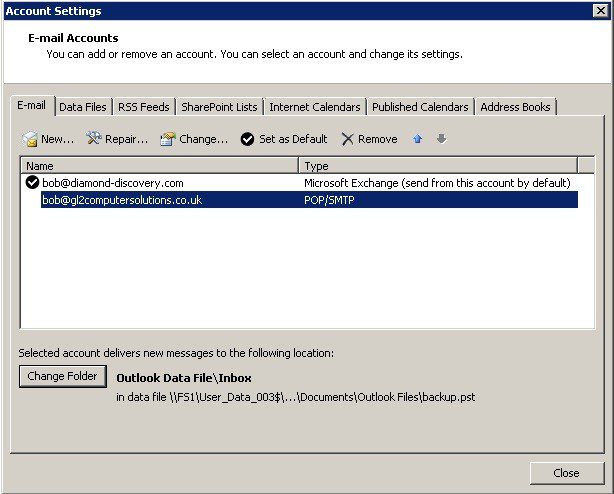
Click on Change Folder opens up-
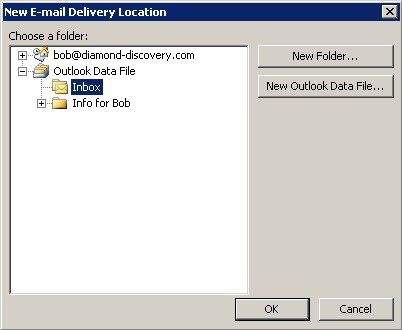
Click on New Folder – give it an appropriate name and save it then click on OK.
Finally –
Open Send/Receive tab, click on Send/Receive Groups and Define Send/Receive Groups.
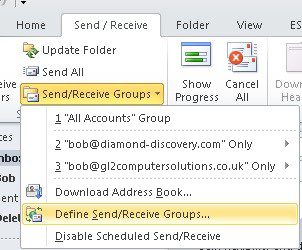
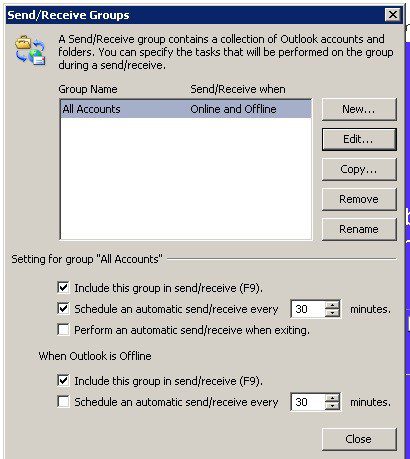
Click on Edit
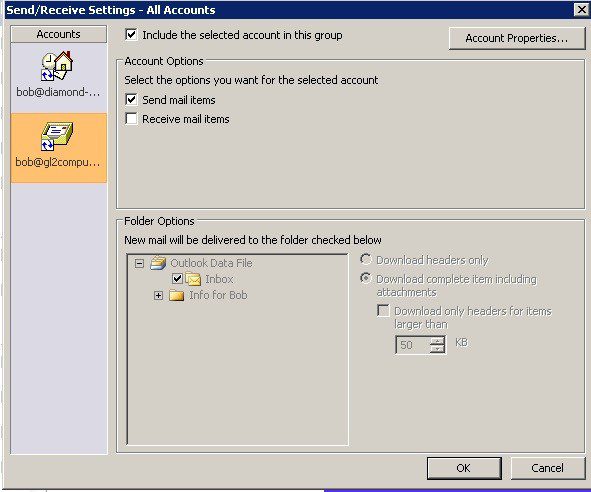
For each of the additional accounts you have set up – that you don’t wish to receive emails untick the Receive mail items checkbox then click OK.
